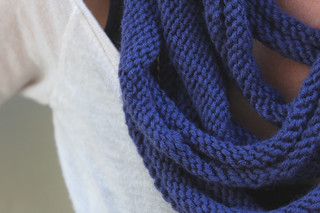
I finally finished my winter knitting project (I'm a really slow knitter so one project each winter seems to be my limit :-). This is my second seven circle (first one here), a beautiful (and free) pattern from Melbourne designer Kirsten Johnstone.
I loved knitting this pattern again. I'd definitely recommend it to a beginner because it's so interesting, lots of casting on and off, not just the same old row after row that an ordinary scarf might be.
This time I used a beautiful midnight blue wool.Using a wool this time has made such a difference to the feel of the finished garment. I had made the first one out of an acrylic that I'd had laying around and it's fine, I like the colour, but it's not a patch on the feel and warmth of this one. I could go on and on about how much I love wool in many different forms. I sewed a merino cardigan recently which I'm hoping to blog soon too.
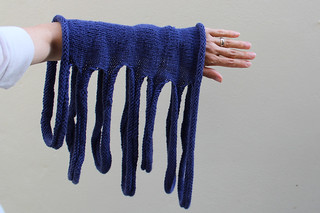
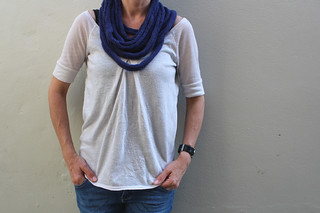
And in case you haven't seen how this clever design works, here it is stretched out on my arm. While I was knitting it (mainly while waiting for kids at dancing and swimming classes) I had so many people looking at me quizzically and asking "What is it??". It does look kind of weird until you slip it over your head and then it all makes sense. She's a clever one, that Kirsten!
Wednesday, November 27, 2013
Tuesday, November 12, 2013
Edible christmas gifts
For the past few Christmases I have cooked a batch of something to give to friends, neighbours and anyone who I'd like to know that I appreciate them. I enjoy the planning, cooking and making cute little packages, finishing them with hand printed tags. All very satisfying!
Last year I made jars of caramelised red onion chutney and packaged them with a box of crackers and some brie. The year before was peppermint bark in cellophane bags with pretty ribbons. This year I wanted to try cordials to mix with soda water or iced water (or possibly vodka for the grown-ups ;-) So I tested out lime this time.
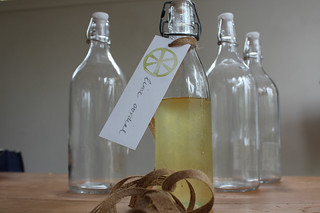
I tried this recipe, which I liked, though it was a bit sweet (the kids love it, obviously!) and I'll adjust it next time. I also love the look of this rhubarb cordial and will try that one too. And in preparation for the gifts I bought some empty bottles from Ikea.
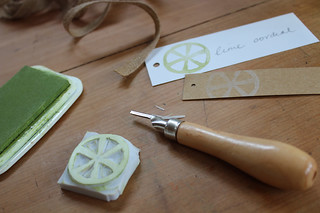
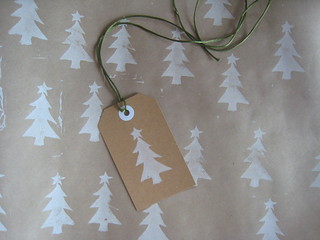
I made a little citrus stamp and used it on a hand written tag with some jute ribbon. I packed up a bottle to give to a lovely friend as thanks for a favour, along with a fresh lime to slice and add to her drinks.
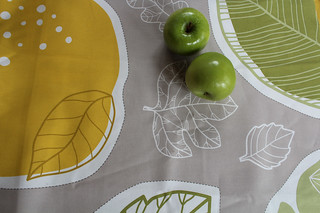
While at Ikea (and will food gifts in mind) I spied the lovely fabric above, which previously had not appealed at all to me, and thought it would make lovely shopping tote bags. See, the sewing sneaks in yet again ;-)
I'll also probably make some more celery salt, one of my favourite little condiments which we use a lot and is quick and easy to prepare, plus there's the opportunity to do some more stamping. And the colour fits well with the Christmas theme too. Important details in the scheme of things!
... and another option would be Apple Jam, a pretty safe bet that most people will like it.
I think I'm starting to get into the spirit of Christmas now. A little craft will do that! How about you - planning any edible gifts?
Sunday, November 3, 2013
New bag: Oliver & S 'day in the park'
I'd been daydreaming about a new bag recently. My needs have moved on a bit in the mum-bag area. Now that the kids are getting bigger we rarely use the pram and I'm finding myself feeling like a pack horse carry everything on my shoulders (and sometimes a child too :-).
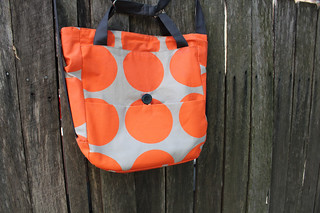
So when I came across Oliver & S' A day in the park bag pattern it looked perfect. I think this pattern was released in 2010 but somehow hadn't come onto my radar.
I had specifically been looking for a bag to take on a school excursion I was going on with my middle child who's in kindy. And anyone who has been reading my blog for a while will know that I'm like a dog with a bone when I get an idea, needless to say this was put together at the 11th hour, but I was so glad I did as it was fantastic on the excursion. See, I'm finding ways to justify the sewing mania :-)
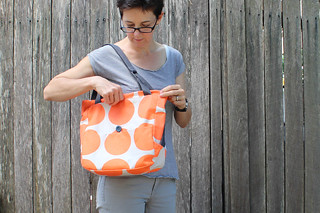
In case you hadn't heard of it either, it's basically a tote bag that you can also use as a backpack. You just pull the straps...
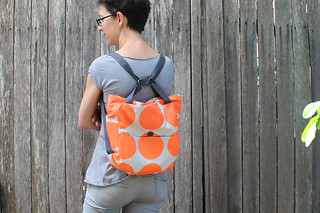
and et voila, it's a backpack. Ingenious!
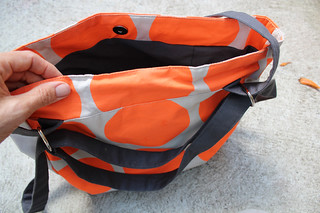
I really loved making this pattern. As you may know I have made plenty of bags in the past and consider mine are reasonably good, but this pattern is such a cut above my efforts. All the little finishing touches make it look so professional, so its practical as well as not looking homemade (which we know is a curse, right, as opposed to handmade :-)
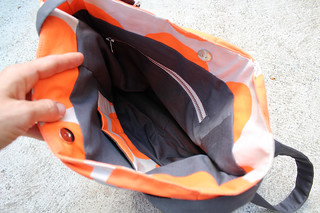
I used a heavyish mid weight cotton dot print fabric for the outer (about $3 worth at Spotlight - yay!) and a dark grey cotton for the lining. I used stiff interfacing as I wanted it to have some body and not slump down, and also interfaced the straps to give them a bit more strength. Annoyingly I couldn't find O rings for the straps, so had to use the closest I could get, and also couldn't find rivets, which definitely would have finished it off even better. I may try to find some online to add.
The only change I made to the pattern was to widen the side panels, as quite a few people seem to have. This definitely made it more practical for my needs.
This bag has already had several outings (and is less than a week old) and lots of favourable comments from people, including a few from friends with sideways glances and the familiar 'did you make that?' question, which I'm sure they regret asking when I start to rave about how much I love it :-)
Subscribe to:
Posts (Atom)