
Hello and happy holidays! I hope you're enjoying the festive season and getting in some sewing/crafting time ;-)
I seem to have a pattern crush on the See Kate Sew Zippy Top at the moment, I've made 3 for myself and 2 for the recent school fete, with plans afoot for 2 more! What I love about it is the simple shape, lovely neckline and sleeves and the scope for adaptation.
This is my latest one, a slighlty more dressy version. I think it's the fabric that really makes this version. Last time I was at mylocal thrift shop a garment caught my eye - I don't tend to shop for clothes at the thrift shop (or anywhere else) these days but I do go looking for fabric to upcycle. The garment was a large kaftan type top from H&M in polyester. My kids say this is my zebra top :-) but I think it looks like a lovely watercolour landscape painting, or something like that. No matter what, I really like it.
I unpicked the existing seams to get maximum area and cut out my pieces as usual. This time I omitted the zip as the fabric is very light weight and delicate and I thought the weight of the zip and facing might pull it out of shape. Also the neckline is wide enough to comfortably go over the head without an opening. I simply turned over the edges of the neckline and armholes twice and sewed a small hem. I wouldn't normally do this as I find it can look messy but in this very sheer fabric and with the busy print it worked fine. I also did my usual length for the hem - I found the crop length too short but the other length too long to be flattering for me so I went in between.
As a decorative element I slightly gathered the shoulder seam and added ties (repurposed from the original top). I really love this type of detail and the extra touch it adds without too much effort.
I really like this version of the pattern. I've worn it with these grey/black jeans but I can also picture it with my favourite black stretch satin cigarette pants for a more dressy evening.
Do you have a pattern crush at the moment? Do tell!
Saturday, December 27, 2014
Saturday, December 20, 2014
Summer sewing : : jersey maxi skirt
I've been wanting a maxi skirt or two to add to my summer wardrobe, for those days when you know, you don't feel like having to be careful when you bend over, or maybe your legs need attention (or 'deforesting' as a friend used to say :-). I'd been thinking about the Sewaholic Gabriola but knew I would labour over the details of that pattern... what I wanted was a quick and easy project.
Trawling through my knits stash I found a quite fluid and lovely navy blue jersey-type fabric. I'm not sure where I got it, possibly my Melbourne trip with Deb earlier in the year. The GJs $2p/m and $4p/m tables were great for fabric to experiment on. Then I found a tutorial online to use as a base and kind of winged it from there (I can't seem to find the tutorial again, sorry, but there are plenty if you Google 'jersey maxi skirt tutorial').
The shape is essentially just an exaggerated A line sewn onto a yoga-style waistband. No closures or fussing, taking advantage of the stretch and drape of the fabric.
Yoga style waistbands really appeal to me as they're so comfy and also add a bit of reassuring stability to delicate or flowy fabrics. To further the safety aspect I added a row of wide elastic into the inner waistband (under the yoga band as you can sort of see below) - when my kids were smaller I had several alarming incidents with clothes where I almost had a loose skirt pulled down, loose top pulled up etc and it has left me not wanting to take any chances!!
And just a note about styling my skirt... I knew the loose shape would suit a fitted or slimline top, but nothing I tried looked right. I tried the Wiksten tank above, untucked as I always do, but that wasn't structured enough - then a funny thing happened where a bit of the hem got caught in the skirt waist and I had an 'ah ha' moment - tucked looked sooo much better, even though I never wear things tucked (well I do now :-). I love lessons like this where you are forced to deviate from what you normally do and go out of your comfort zone. I think this old dog has learnt a new trick ;-)
Monday, December 8, 2014
Tween sewing
Several years ago I made my eldest girl a Sophie Tunic from Sisboom as a sun/beach cover-up. She's loved it and worn it to death but for a while now it's been way too small and she's been asking for an update. So when we were in a fabric store together recently I asked her to pick out a new fabric. She chose this lovely Cloud 9 printed cotton (proud mother moment ;-)
I think this is a great style for kids, not too cutesy or fussy and easy to wear. The fabric was lovely to work with and the top came together well and easily. If anything I find the Sisboom patterns a bit over-explained but then I guess that makes sure newbie sewers are covered.
The only change I made was to add sleeve tabs. The tab pattern is from my Make it Perfect Shearwater Kaftan pattern, which is like a grown-up version of the Sophie tunic. Make it Perfect now also have a little girl 'mini' version of the Shearwater, but as I already had the Sisboom pattern I thought I'd better save my pennies and re-use it. Don't you love kids patterns with a large range of sizes!
I also made her some new shorts, which happen to go reasonably well with the shirt. The pattern is Dana from Madeit's Shorts pattern, which is a great basic, especially for someone with a few kids to clothe - the sizing goes from 12 months to 10 years and Dana includes lots of tutorials for variations on her website/ It's one of those patterns where I wondered whether I should draft them myself, but really, for $8 you get all of those sizes already drafted, and who doesn't like to support the lovely indie designers. This is the 4th pair of shorts I've made from this pattern and I'm sure there will be many more.
For these I used a piece of black linen with some stretch my my stash, redesigned the front to add sewn in pockets (easy to do if you've sewn pockets before) and added 2 large decorative buttons.
She likes the whole outfit so we're both happy :-)
Friday, November 7, 2014
Tessuti Alice top
I had one of those rare reactions to seeing a new pattern recently: I wanted to buy and make it immediately! Tessuti's new Alice Top & dress pattern was the culprit.
I made a shameless copycat version, though my fabric is just a plain old cotton (from a thrifted doona/duvet cover) rather than the fine linen of the sample. The drape is not quite as nice but it's the same thin blue and white stripe and I love it :-)
This is my first Tessuti pattern and I enjoyed making it. The instructions were easy to understand and thorough, and the top went together well. I've always loved smock tops (either when pregnant or not!)and this one has a lovely armhole detail too. I made the size small with no alterations apart from shortening it, though in hindsight I think I was a bit over enthusiastic and next time will leave a few more centimetres in length.
I'm thinking this top will be a real workhorse over spring and summer and can definitely see myself making more, though I don't think I'll try the dress, as anything sack-like tends to swamp me and my shapeless legs poking out of the bottom look a bit ridiculous ;-)
But now I really need to get onto sewing some trousers, as I'm sadly lacking! I'm thinking Spit up and Stilettos' Emma Pant (previously known as Sewloft - have you seen their patterns are free now? Such an amazing thing to do), or a woven pair of Hudson Pants... I really should make both, it's getting too hot here for jeans. What's on your list at the moment?
Saturday, September 20, 2014
Another new bag and a mini Maximus cowl
It was that time again recently - time to make a new bag - and an idea had been brewing in my head for a while...
Usually my bags wear out with use, but this time the old one was still going but just didn't have the functionality I needed. You see we're going on a trip, and as much as I like the previous bag, the fact that I can't use it messenger style accross my body drives me mad. Especially when I'm walking any distance or when I'm wearing my minoru jacket - something about that jacket (maybe the big collar and raglan sleeves?) makes bags fall off my shoulder - grr!
After making so many bags (there are a stack to see if you're interested under the 'bag' category over on the right there >) I've come to know what's useful for me personally, so this time around I had a pretty tight list of practical requirements:
Something that could be worn messenger style...
Or on the shoulder...
With internal pockets for pen, phone, lip balm etc, ...
A key fob inside is handy and so is a zip pocket, and also an external zip pocket to quickly stuff keys into on the run.
Regarding the look of the bag I wanted something quite utilitarian looking but with some nice details. As I knew what I wanted I didn't use a pattern but made it by cutting a simple rectangular shape with cut away corners (not sure what the proper name for that is?) to give a hobo bag feel.
I used an old thrifted leather belt for the strap. I can't remember where I got the idea from, but I cut the belt while it was buckled and then attached each end to a side, handstitching it on with hemp thread. I hope it holds! Must remember not to carry any heavy kid water bottles in it! Using a belt sounds a bit naff and gimmicky but I think it comes off OK and does the job, plus adds the slight bit of grunge I was after. I do like a bit of grunge :-)
I had a great piece of grey linen I wanted to use for the outer, and even though it is cool toned and the belt is warm I thought they went together nicely, and decided to accentuate the warm/cool thing by adding brown taped zips (with silver coloured metal teeth) and brown toned fabric inside. It sounds like a lot of navel gazing but I really love experimenting and putting all the little details together :-)
All the materials I used are from my stash (yay stash busting!), some things I'd been hoarding for ages. I always cut off zips, buckles, buttons, sliders etc when I throw away an old bag (or whatever) and just put them away for another day. It's so satisfying being able to use them up one day, and feels great to not have to go out and buy yet more stuff, which is the positive side to stash hoarding I guess. And a friend recently gave me the inside fabric which I love (hello H if you happen to be reading! And thank you!).
The cowl I'm wearing here (note the warm/cool thing with the cowl & briar too :-) is the Maximus pattern from Chic Knits. I'm calling it my mini maximus because I ran out of wool and so it's smaller than the pattern specifies. It was such an enjoyable knit, on big needles, very quick and satisfying, if you're looking for a project I'd recommend it.
Wednesday, September 10, 2014
Winter Everyday Skirt
It's spring here now - yay! - and my thoughts have turned to spring/summer sewing projects, but I still have some winter sewing projects to show. This simple little skirt is the Everyday Skirt from Liesl + Co.
I had been wanting to add a winter skirt to my wardrobe and when I saw this pattern I thought it would be a quick, satisfying sew, which it was. It's similar to Simplicity 2226 which I love, but a bit simpler as it doesn't have a zip. In case you haven't seen this pattern before, it is a simple construction, the front is gathered below the waistband and has elastic in the back of the waist.
It has Liesl's typical fantastic instructions and beautiful drafting. Her patterns really are so professional and a joy to sew. I love the pockets and it's so comfy to wear. The only change I made was to raise the hem as it was feeling a bit frumpy and wasn't draping well, and I'll always wear this with tights.
The fabric I used is to be honest probably not ideal for this skirt - it's quite a heavy wool and doesn't sit as nicely as something with a bit more drape would. You can see from the pic above that it's a bit bunchy around the elastic at the back. But it's OK and I'm certainly getting quite a bit of wear out of it.
I bought the fabric back in autumn on sale from The Fabric Store (I think it was about $8 a metre). I loved the colour and thought that the metallic threads running through it looked OK, but when I grabbed the fabric back out of my stash for this skirt I thought the metallic thread jarred with the style and made it looked a bit cheap. So I started to pull the threads out one by one, it took a while but was quite cathartic really! I got some funny looks at kid activities as I dragged it around with me for a few days pulling a few out here and there, ending up with a pile of metallic threads on my knee each time. You might just be able to see the glint of the threads in the pics above (the pockets didn't get the treatment).
For summer I'm looking forward to making a couple of these in lightweight linens or cottons. Be sure to check out all of the lovely versions in the Flickr group.
Friday, August 15, 2014
Merino(ish) Coco dress
This winter I am sooo loving using and wearing wool. It is such a fantastic fibre, I could go on about it all day ;-) I have a blog post in mind based on my little experiments using wool, but for now I thought I'd show you my very latest project involving wool, this Tilly and the Buttons Coco dress...
I first found this fabric in a dark grey/khaki colour last year at The Fabric Store (my mecca for all fabrics merino) and used it to make a pair of Black Spinel pants. The fabric has 2 way stretch, making it great for pants, and I have worn them to death over winter, they're so soft, warm and comfy and a little edgy too. They don't bag at the knee and wash and wear beautifully. It's hard to describe the fabric - it's like a ponte (or 'sharkskin?') on the right side, very smooth and with a slight sheen, but then a loopy terry on the reverse. I guess the terry is the merino and the right side is something synthetic, as surely you can't get that finish with wool?!
So when I found some more of it in the recent sale I snapped it up. And at only $8 per metre (and 150cm wide) it was a bargain! The only problem was that the colour was a little crazy - it's sort of a deep teal blue with that sheen. I thought it would be OK for another pair of pants... but I got cold feet and decided to try it for the Coco. I reasoned that the simple lines and shape of the dress would balance the crazy colour.
I decided the dress would benefit from some subtle detail to keep it from looking too basic (it's a fine balance in my opinion!) and I knew from the Black Spinels that the fabric top stitched beautifully, so I added a decorative seam horizontally on the chest and also two seams on the sleeves. I considered pockets but am still deciding on that, it's a detail that can be added later I think.
The only other change I made to the pattern was to take in the side seams from the wrist right down to the hip to give it a more fitted look. Which maybe means I should have used a different size, but with knit fabrics I like being able to tailor the final fit around my curves and also each fabric behaves differently depending on stretch.
I'm pretty happy with the dress. I need to think about how to style it (don't think I've done the best job here), but again thinking of balance I'm inclined to team it with natural fibres - here with wool tights, cotton scarf and wool cardigan - to offset the synthetic sheen of the fabric's finish.
Have you come across any crazy fabrics lately? And are you a wool addict too?
Friday, July 25, 2014
Kids pj sewing
I've decided that sewing kids pyjamas is a great way to gain experience and feel more confident sewing with knits... small pieces of stash fabric can be used (ie not precious pieces), and it doesn't matter if the finish isn't perfect as they're just going to be lounged in and worn to bed. The finished piece gets worn lots and children stay warm - win win!
On a bit of a roll recently I made my boy a pair out of this cute woodland animal print jersey from Spotlight. It's has a really nice soft feel and good stretch & recovery. For the top I used the Oliver & S Filed Trip raglan t-shirt pattern. I bought this recently thinking it would be great for all 3 kids for both tshirts and pj tops (and more - show you later) and it also appealed that the pattern goes up to size 10, which shoud do us for a while. And the pants are based on the Sleeping Johns pattern from Growing up Sew Liberated. They are basically just loose leggings with an elastic waist and cuffs at the ankles.
He's such an easy kid, loves everything I make for him (at the moment!! Guess I should enjoy this while it lasts ;-). He loves these and I love seeing him warm in his mama mades.
I also made my girls nighties, you can see one on my middley above. For this I used my much-used Made by Rae Flashback Skinny tee, which I lengthened and flared out to an A-line shape.
In all I've made about them about 2 new sets each and been able to finally throw away those tatty, stretched and stained old pjs (why did I not do this ages ago?!). My stretch sewing is definitely looking neater and I can whip around cuffs and hems pretty quickly now, which is useful. I'm even starting to get my preferred ways of sewing things which I'm hoping to use on future projects. I love how it's also opened my imagination up to how I can adapt patterns.
Tuesday, June 24, 2014
Burdastyle asymmetric jacket
Hi! I've been completely immersed in organising a fundraising event at my kids' school for the past few weeks and though I thought of this little space often, it's been totally neglected... along with the just about everything else! I'm glad to be back :-)
OK, Burdastyle Asymmetric Jacket. Now firstly I should apologise for the extremely ahh lived in look of this jacket. All those wrinkles and creases are from all the wear it's had since I made it a couple of months ago (and have been meaning to blog ever since), which shows that I'm getting a lot of use from this garment, which has got to be a measure of success!
I like the challenge of sewing something reasonably complicated now and then, and this one had a few challenges for me, but I've got to say that I don't think Burdastyle patterns (or least this one) are the patterns to learn from as the instructions are so brief. A certain amount of knowledge is presumed, and this one's difficulty rating is 'Intermediate', which I'd consider myself to be, but when you come across a technique you haven't tried before, like the sleeve openings, you get no help at all to explain it - no drawings or detailed explanantions. I know lengthy descriptions of each step annoy some sewers, but for me I'd rather have that and be able to skip it rather than not have it at all. Anyway, it all turned out OK but I just fudged my way through those sleeves in the end.
The other thing I'm not fond of with Burdastyle is the lack of seam allowance on the patterns. I'm just not used to it and find it hard work. But I did get through it, needless to say I was pretty happy when the pattern printing/cutting/sticking/tracing stage was over! The base calls for a magnetic snap, which my kids laugh at each time it sticks to the car ;-). This makes the front hem sit well. I didn't add the button to the top inside flap as called for in the pattern but it seems to sit OK without it. I also haven't added buttons to the sleeves as I couldn't find what I wanted... hopefully one day! Another thing I clearly didn't understand properly was the lining pleat in the back seam, which seemed hopelessly small, as it's split! So some maintenence is required!
Having had my whinge I now want to say though how much I love this jacket :-) The style is lovely with all its little darts and shaping. I love the asymmetric opening, and like wearing it open, closed and half open. It's extremely versatile, warm but lightweight and just very wearable (hence all those wrinkles ;-)
I used a mid weight deep blue linen bought at The Fabric Store which I'd stashed away waiting for the perfect project, and lined it with an ordinary lining fabric (also from the stash - yay, stash busting!). And I found a heavy weight metal zip, which I think adds weight and a nice touch to the softness of the linen. I'm almost wishing I'd interfaced the lapels/front sections as the linen is sluming a bit as it relaxes and softens, but I think that's part of the beauty of linen.
Also I deviated from the pattern by adding pockets to the front seams. I had almost finished the outer jacket when the niggle in my mind got too loud "you'll want pockets!!" and I had to listen to it! I wanted them to be reasonably hidden and flush with the front so as not to add bulk, and they work pretty well, and are certainly used well.
So, apart from a few things that annoyed me with the pattern, a great jacket! And a great addition to my wardrobe. Have you tried Burdastyle patterns? Love the style but don't love the pattern details? Or is it just me!
Thursday, May 29, 2014
MMM findings: trousers needed!
Well, I had good intentions for posting here weekly on my Me Made May progress, but in the end it all seemed too hard and too time consuming (I blame Instagram for making me blog-lazy ;-) So if you're interested please have a look over to the right there at my instagram feed to see what I've been wearing.
The month is almost over now, and as with last year it's been fun (mostly!) and revealing too. My findings:
1. As the weather has been so pleasently warm aside from the first week, I've had plenty of wear from my light short sleeved tops. Next summer I must make some more, they're so easy and wearable.
2. May is a bad month for dress wearing for me. I guess it's just because the weather is too cool for summery dresses but not cold enough for thick tights (which I love). And I've also lost my enthusiasm for my knee high boots, though my Fly London ankle boots are getting loved to death at the moment ;-) On day 16 I loved wearing my Moss Mini with opaques, and my denim Simplicity 2226 got a look in on day 20, but apart from that the only other dress that got a look in was a self drafted dress worn for a night out on day 24. So...
3. More pants needed! I basically live in jeans most of the time. My lifestyle at this time in my life requires very casual clothes. I did wear my Tamanegi-kobo Black Spinel trousers several times (unblogged), but apart from that it was all RTW on the jeans front. I've resisted trying to sew jeans in the past but I'm coming around to the idea, especially after seeing other lovely versions around the blogs.
Top contenders on the pattern front are:

Named Jamie Jeans. They seem to have a cult following... must be a good pattern!

Burdastyle Floral skinny jeans (but not in floral), I've also seen some lovely versions of these around (though can't say I'd be thrilled to tackle another pattern without seam allowances again in the near future. Grrr)

Burdastyle Anita jeans. Nice. And look, seam allowances INCLUDED!

and I also like the Named Alpi Chinos for their classic styling
Any recommendations welcome!
The month is almost over now, and as with last year it's been fun (mostly!) and revealing too. My findings:
1. As the weather has been so pleasently warm aside from the first week, I've had plenty of wear from my light short sleeved tops. Next summer I must make some more, they're so easy and wearable.
2. May is a bad month for dress wearing for me. I guess it's just because the weather is too cool for summery dresses but not cold enough for thick tights (which I love). And I've also lost my enthusiasm for my knee high boots, though my Fly London ankle boots are getting loved to death at the moment ;-) On day 16 I loved wearing my Moss Mini with opaques, and my denim Simplicity 2226 got a look in on day 20, but apart from that the only other dress that got a look in was a self drafted dress worn for a night out on day 24. So...
3. More pants needed! I basically live in jeans most of the time. My lifestyle at this time in my life requires very casual clothes. I did wear my Tamanegi-kobo Black Spinel trousers several times (unblogged), but apart from that it was all RTW on the jeans front. I've resisted trying to sew jeans in the past but I'm coming around to the idea, especially after seeing other lovely versions around the blogs.
Top contenders on the pattern front are:

Named Jamie Jeans. They seem to have a cult following... must be a good pattern!

Burdastyle Floral skinny jeans (but not in floral), I've also seen some lovely versions of these around (though can't say I'd be thrilled to tackle another pattern without seam allowances again in the near future. Grrr)
Burdastyle Anita jeans. Nice. And look, seam allowances INCLUDED!

and I also like the Named Alpi Chinos for their classic styling
Any recommendations welcome!
Sunday, May 11, 2014
Tova with modifications
I've had a design for a blouse in mind for ages... loose but flattering, with gathers, cap sleeves, a gently curved hem and some interesting details. When I couldn't find a pattern like it I decided to give it a go myself.
The closest design I could think of was the Wiksten Tova so I started with that and modified it.
Firstly I modified the sleeves, as I did on this one to be capped, then did a circular cut-out, binding around it and tieing a bow.
Then for the back I seperated the pattern horizontally along the shoulders so that it made a yoke, added width to the lower piece and gathered it in the centre.
I also modified the collar to be smaller, cropped a few inches off the hem of the pattern and the curved the sides, making the back slightly lower than the front.
The fabric is one of the lovely Japanese lawns from Spotlight that I've been enjoying using lately. It's really soft to wear and washes well too. I love the cute design, and the dusty pink with the little splashes of blue on the birds is really sweet.
In hindsight I don't think I needed the gathers at the back, they make it a bit pouffy. But overall I'm pretty happy with this top. It's easy to wear and a nice change from t-shirts. And the loose fit and drape go well with skinny jeans.
Saturday, May 3, 2014
Melly Sews Hi Lo Top and MMM'14
On the last day of April I decided I'd sign up for Me Made May again this year. Last year was my first year and I really enjoyed it, much more than I thought I would. I found that I hardly had to think about reaching for me-made as it's automatic and also it identified the gaps in my wardrobe. Plus, there's of course the great big bonus that I get to connect with lots and lots of lovely like-minded sewing fanatics all over the world, yay!
So here's my pledge:
'I, Jo of Bubala sign up as a participant of Me-Made-May '14. I endeavour to wear at least one item made by me each day and once a week a whole outfit (excluding underwear, shoes and socks) for the duration of May 2014'
I will posting a pic each day on my Instagram feed then hopefully do a round-up here after each week has passed. Anyone who's done MMM before will know that the photo taking is the hardest part!
I wore this top on day 2 and thought it was time I blogged about it before it falls apart through over-wear :-) I made this a couple of months ago and it's been in regular rotation ever since.
The pattern is the lovely free 'Hi Lo top' by Melly Sews. From the moment I saw this pattern I thought I'd love it, so I downloaded and printed it and waited for the right fabric to jump out at me :-) The pattern comes in only one size, but I think it would be reasonably easy to change a bit. I'm about a size 10/12 Australian (bust 34") and it fits well.
I love the overall shape of this top and it's been perfect for our autumn weather when you need a little extra coverage. One change I made to the pattern was to add a casing to the sleeves and thread elastic through. I have done this with other tops and it's worked well. I don't particularly like sleeves just hanging and find the elastic comfortable.
The other change I made was to add some pin tucks to the front. I love the look of pin tucks and hadn't tried them before so thought this would be a good pattern to try them on.
I used this tutorial, applying the pintucks to my flat (uncut) piece of fabric. I then placed the bodice pattern piece on the fabric so that the pintucks are in the upper centre of the piece. I then cut out the other pattern pieces and sewed them together as usual, applying the binding to the neckline as usual, which covers the raw ends of the pintucks. I choose to do 7 pintucks (my lucky number ;-) and just eyeballed how long I wanted them. As I'd done the pintucks before cutting out the pattern I didn't add any width to compensate for the width they take up, but if you were to cut them out first I'd consider adding a bit (about 1.5 cm in this case as each pintuck is about 2mm). Though, having said that, these pintucks are so tiny that if you had a loose fitting top you wouldn't necessarily need to bother. It looks like mine are straining a bit in the pic above but it's just that I'm stretching my arm out to take the selfie :-) I had so much fun doing the pintucks and will definitely be adding them to other garments in future!
The fabric I used was a Japanese lawn from Spotlight that I bought on sale and stashed away for the perfect project. I have used several of their lawns now and find them really comfortable to wear, quite strong but with a lovely drape. They also wash really well. I find it so annoying when fabrics suffer greatly from laundering. I do seem to find that Japanese made fabrics are superior to others. Gross generalisation but that's my finding so far. Do you agree?
Monday, April 28, 2014
Cali Faye Collection Racer Back Flare dress
Hi all! I hope you had a good Easter/holiday.
Looking around the blogs lately I've realised I'm not alone in being on a Cali Faye Collection fad :-) So far I have 3 of their patterns and am trying to hold myself back from buying the Voila blouse and Cadette Coat. One thing I like about them is that they work for both my 6 year old and 9 year old - they're simple and stylish without being fussy, and the size goes up to age 10 (though my girls are on the smaller side so I think I'll get even longer out of them).
I fell in love with this little dress pattern, the Racer Back Flare, late last year and thought it would be perfect for my little girl's 6th birthday.
I made it up from a piece of a doona (duvet) cover that I found in my favourite charity shop. I really like reusing old sheets, covers, pillowcases etc, often the fabric is still in great condition and offers something a bit different. It's also often made of 100% cotton or linen and is comfortable to wear.
There's so much to love about this dress. Chiefly it's just a really great shape, with a perfect amount of flare and really well shaped neckline and armholes. The bodice is lined and the opening closes with a button, so no tricky zips or fastenings.
It's the perfect dress for twirling...
And even though she wasn't feeling well on the day of these pics she loves her dress and has worn it many times since her birthday last December. As the weather's cooler now she's can layer it with tshirts and leggings so it's really quite versatile. I also made her sister one in a totally different fabric. Now if I could just get around to photographing it!
I'd thoroughly recommend this pattern to anyone looking for a cute girls dress which is quick to sew and fun to wear.
Monday, April 14, 2014
Cali Faye Collection Perri Pullover
This post comes to you tonight courtesy of my procrastination on the task I'd mentally assigned myself earlier in the day: making cushions (or 'pillows')...
You see we have friends coming for lunch over Easter and I really wanted to get my act together and fix the woeful cushion issue in our living room. I know that my friend probably won't even notice them, but I will feel better if there's something new and fresh, know what I mean? And it will get them off the blasted 'to do' list!!
But I've procrastinated to the point where I now know what I haven't admitted to myself before... I loathe making cushions. I suspect this is down to the boring nature of the project. Plus I resent the fact that I could be working on my Asymmetric jacket or fulfilling one of the many sewing requests from the kids ;-)
Oh dear, I think I'll have to bribe myself tomorrow night with a big block of chocolate or something!But for now I'll continue to procrastinate and show you the Cali Faye Perri Pullover I made for my big girl's recent 9th birthday...
I wanted a casual top for her that wasn't too young, something stretchy and comfy, and I think this pattern fits the bill.
It came together well, using a medium weight interlock I found at Spotlight. I was going to make her some leggings to go with it but couldn't find any 2 way stretch fabric I liked, so picked up these RTW tights for her, they have a cute metallic thread running through them, but they're a bit tight and I also think either the pullover needs to be a little longer on her or worn with leggings of jeans/trousers.
I enjoyed adding the little touches of the pocket lining and matching tag at the neck (idea pinched from Kelly, thanks Kelly!).
(Apologies for the wrinkly shot above) I really like this top and am now struggling not to go and buy the grown-up version for me ;-)
So how about you - do you have anything you really don't like sewing?
Tuesday, April 8, 2014
In lieu of KCW
Hello! Long time no post... I have certainly been making and doing and all that goes with it, just not getting around to photographing and writing about all of my makes. But I have plenty to show you over the coming weeks, including a recipe or two as well (it's been a while!).
I had intended to take part in KCW this time. The kids do need some clothes and heading towards winter as we are I really should do an audit of what they need. However last week I spent any and all available down time sewing for my elder daughter who was turning 9 (what?!). I made her two lovely Cali Faye patterns which I'll hopefully show soon. By the end of the week I had the sudden and very strong urge to finally start my Burdastyle Asymmetric jacket, and I figure it's best to 'strike while the iron's hot', considering I've been avoiding it for a very long time! So that's what I'm doing this week. Sorry kids! I will get back to them but not in time for KCW, this jacket needs a slow and steady pace to do it and the lovely fabric justice (you may have seen a snippet of it if you follow me on Instagram ;-)
Anyhow in the meantime, and in lieu of participating, I thought I'd show you some things I've made for the kids in the past months.
My girls declared before Christmas that they liked nighties, and as I was looking for a quick sewing project to add to their Christmas present stash I dreamt up these and whipped them up over an evening or two.
I used a cute border embroidered voile from the stash and drafted a simple pattern, just two pieces, back and front, and finished with bound edges that become the tie straps. I love the soft purple colour of the voile and happened to have some lovely matching ribbon to add pretty little bows to the fronts.
My girls squeeled with delight when they opened their parcels and found matching nighties, which is about as good as it gets for a sewing obsessed crafty mama, don't you think?!
I really love seeing them in these nighites, they've had a ton of wear since Christmas and hopefully will fit for a couple of years, given the simple style. Win win!
Monday, March 17, 2014
(another) New bag
Last week I made myself another new bag. I seem to go through them at quite a quick rate (maybe 1 every 6 months or so), but I guess that's what happens when you A. make them out of fabric and B. use them constantly and throw them around from floor to playground to chair to everywhere and anywhere. I guess one upside of the high turnover is I get to try out different designs and patterns and I never really get tired of one bag.
This time around I had in mind a slouchy style with mixed materials: a lovely heavy grey linen I've been hoarding for ages along with a recycled leather strap in maybe teal or red (the same scraps I make my cuffs from), or perhaps even one of my thrift shop belts, cut strategically to make use of the buckle etc. But somehow I just could not get started on this project (maybe it was fear of rivets?!) and the need was getting dire! So I pulled up this free tutorial and pattern from Very Purple Person that I've been wanting to try. I chose some stash fabric and quickly made this interim bag.
This is such a lovely straightforward pattern. I really enjoyed sewing it. The only changes I made were to make the handles a bit longer and, rather than pulling the whole bag through the handle opening as instructed, I left a gap at the bottom of the lining and turned it out through there and sewed it up later - as both my fabrics are quite heavy it was never going to go through the handles.
I also added a zip pocket to each side, using a heavy ticking from my scrap stash for the lining, adding to the rigidity of the structure. I used a heavy denim for the outer and a piece of this lovely "Hibernian House" print from a great local printer Publisher Textiles. If you follow them on Instagram you'll know what lovely work they do.
Even though this is a reversible bag, and I do love the print I used on the inside, I think I'll hardly ever use it with the red side showing as the denim is just so much more versatile and won't clash with anything else I'm wearing, unless you count 'double denim syndrome', which I just try not to think about :-) But it's a great splash of colour and visual texture. And I finally found a use for the cute little dear keyring I've had laying around - a fun zipper pull :-)
So there you go, a quick and easy pattern when the need for a new bag is dire, but also just a nice bag all round.
Wednesday, March 12, 2014
April Rhodes Riding Peplum
Have you tried April Rhodes' Riding Peplum pattern? I bought it just after Christmas (and just before my pledge to not buy any new patterns in the near future :-), I've made 2 now and I love it.
I knew I liked the peplum style (after initially resisting it) after trying and loving Victory patterns' Ava. And as I was looking for another good versatile summer top pattern I thought I'd give the Riding peplum a try. Plus I saw the versions that the girls at Fancy Tiger Crafts made and loved them - it's always nice to see other people's versions of a pattern, don't you think?
I love the proportions of this top and the 'flippiness' - I am declaring that a new word ;-) It's simple and easy to wear but a nice alternative to my beloved Wiksten Tanks when I feel like something a little different.
The design is a simple 4 piece construction which pulls on over your head - no zipper or extra openings. I made a size small which fit nicely around the shoulders but then I went and took the side seams in as much as I could from just below the bust to the waist so that I could still slip it over my head. This was because I wanted a slightly more fitted look. April does mention in the instructions that if you wanted it really fitted you'd need to put a zipper in the side. But of course this would make it a more complicated project. I think if you use fairly drapey fabric and take it in the side seams if necessary you can still get a reasonably fitted look, while still having enough ease for movement and comfort.
I also lengthened the bodice pieces as I do with all waisted garments, as I have a long torso. The neckline and armholes are bound with bias binding, which is a little time consuming but produces a nice finish. And considering that the main construction of the garment is so quick, it's still a quick project. I used a piece of printed voile from my stash (leftover from this Wiksten tank).
I made a silk Riding Peplum to wear on a girls night out for International Womens Day recently. If you follow me on Instagram you may have seen a pic of me snipping threads from it whilst waiting for my train, hee hee :-) Blog post to come.
Monday, March 3, 2014
Sun cover-up kimono jacket
Here in Australia we see a lot of sun. I don't say that to make you northern hemisphere dwellers jealous, honestly :-) The light here is really harsh, and sees many of us suffer under it. My heritage is English and so my skin does not cope so well, I've had a skin cancer cut from my face and would be surprised if I don't have more. Not that I sit out in the sun, it's just that it gets you even when you have sunscreen on, are trying to stay in the shade and just going about your business.
So... particularly in summer I try to wear my hat (and sunglasses) everywhere, and I also find that covering up works the best, if I can. Those dessert dwellers with their loose floaty tops and trousers seem to have worked it out. Taking inspiration from that I'd been thinking of making an open shirt (like a light cotton cardigan) when I saw a lovely kimono jacket on Renee's blog. I thought it might be the answer when I'm heading outdoors to go get the kids from school and need to cover my shoulders to stop them getting burnt.
I grabbed this tutorial that Renee had used and drafted a pattern based on the instructions. I added a thick strip of double fold binding to the front and neck edge, to give it a bit of weight and structure and also a bit more coverage around the back of the neck area.
You can see the shape of the jacket in the pic above. It's very simple but really comfy and drapes well, though I think a rayon would drape better. I looked for some but couldn't find anything I liked, so with that nagging little voice in the back of my mind I used a Japanese cotton lawn fabric from my stash, bought from Spotlight on a whim (isn't it all?!). I had fallen for the blue background and dandelion print. The drape could be better but it won't stop me from wearing it.
And even though I made this as a sun cover-up it's really nice to wear for a little extra warmth when the sun isn't out and the temperature drops.
Sunday, February 16, 2014
Make do and alter
I'd been wanting a short sleeved shirt to wear recently and thought I'd like to make a couple (plans are afoot), but of course that would take time. How many times have I wished I had some sort of sewing time machine and could conjure up the garment then and there! But then I guess I'd miss out on the fun of actually making it, which is meant to be the point, right?!! Arghh!. Anyway... I opened my wardrobe and there staring at me was my ikat print cap sleeved Tova.
When I made it I loved it, and still do, but for some reason it never gets chosen to wear, even when I'm craving that style! I always thought what put me off must be the bright colour and crazy pattern, that I'd need to be in the mood to wear it, and I guess that mood didn't take me often. I tried it on and was pondering this when it suddenly hit me that the length is all wrong. I'd originally extended the length from the pattern so that I could wear it with my Japanese Black Spinel trousers - the short top over leggings is not a look for me. But the truth is that it never really went with the black spinels anyway.
So out came the scissors, I chopped a few inches off the hem and re-sewed it... 15 minutes later I had a much more wearable garment. It's a subtle adjustment but one that I think makes a lot of difference to the feel of the shirt. Time will tell but I think this might even have turned into a favourite, when I'd almost given up on it.
I think the lesson this has taught me is that if something isn't working, especially when I've put lots of time and effort into making it, I need to try to work out what the problem is and fix it before starting something new (while dreaming of those new tops to come ;-)
Monday, February 3, 2014
Jacket love
I've been dreaming of jacket patterns lately... which may be due to thoughts of autumn, even though the weather is still pretty hot here. But more likely just that I love jackets and am almost dress and skirted out!! Here are some of the top contenders:
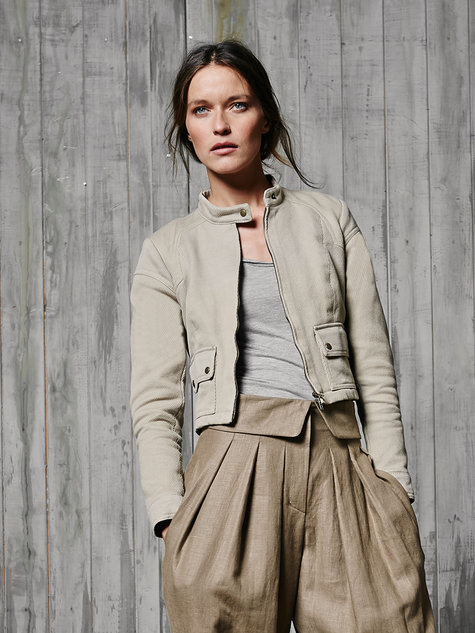
Love the shape and detailing of Burdastyle's Desert Moto Jacket 02/2014 #128
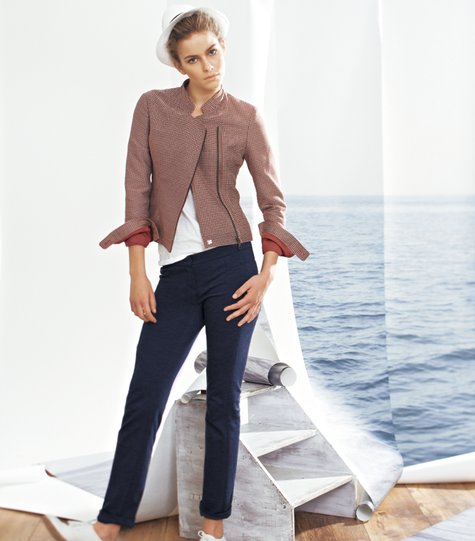
Next, a classic jacket, exactly the sort of basic I need, Burdastyle cropped jacket 01/2011

And now a pattern that I already own and is all cut out and ready to sew, if I could only get over my fear of the scant instructions, Burdastyle Assymetric Jacket 03/2012 Please disregard the bizarre pose/expression - why do they do that?!!
And possibly this one, Burdastyle Crossover Blazer 06/2012... though not with this styling! Again, why?!! Best to go look at a real one like this.
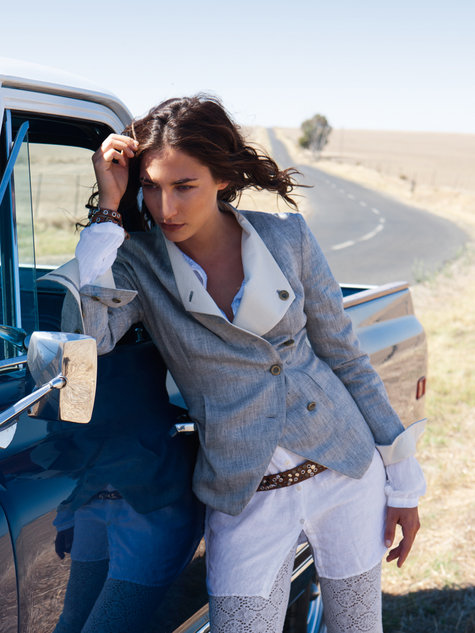
And, last but not least (the only non-Burdastyle, for some reason) Vogue V8601 riding jacket. I saw and tried on a beautiful version of this pattern at a lovely little sewing shop in my very own suburb (unusual!) that unfortunately didn't survive :-( The owner wouldn't sell me the pattern or the jacket unfortunately, and when I search for this pattern online it has the dreaded OOP (out of print) after it... I have looked high and low for a good while now for this lovely classic pattern with a twist, but alas have yet to find a copy... It looks a bit weird in this drawing (don't they always) but you can see one of the lovely versions here. If anyone knows where I can get a copy please put me out of my misery and let me know.

Do you have any jacket patterns on your 'to do' list? Of course I could always try another Minoru, it's still my all-time favourite make, but the opportunity for something different is urging me along :-)
Love the shape and detailing of Burdastyle's Desert Moto Jacket 02/2014 #128
Next, a classic jacket, exactly the sort of basic I need, Burdastyle cropped jacket 01/2011
And now a pattern that I already own and is all cut out and ready to sew, if I could only get over my fear of the scant instructions, Burdastyle Assymetric Jacket 03/2012 Please disregard the bizarre pose/expression - why do they do that?!!
And possibly this one, Burdastyle Crossover Blazer 06/2012... though not with this styling! Again, why?!! Best to go look at a real one like this.
And, last but not least (the only non-Burdastyle, for some reason) Vogue V8601 riding jacket. I saw and tried on a beautiful version of this pattern at a lovely little sewing shop in my very own suburb (unusual!) that unfortunately didn't survive :-( The owner wouldn't sell me the pattern or the jacket unfortunately, and when I search for this pattern online it has the dreaded OOP (out of print) after it... I have looked high and low for a good while now for this lovely classic pattern with a twist, but alas have yet to find a copy... It looks a bit weird in this drawing (don't they always) but you can see one of the lovely versions here. If anyone knows where I can get a copy please put me out of my misery and let me know.
Do you have any jacket patterns on your 'to do' list? Of course I could always try another Minoru, it's still my all-time favourite make, but the opportunity for something different is urging me along :-)
Saturday, February 1, 2014
Another moss mini
Gee I love the Moss Mini pattern! Here's no. 2 and I'm aleady dreaming of 3 and 4 ... I'm thinking of one in a silver coated denim I've been drooling over (like the fabulous one from Funkbunny and also this beauty from Sallie Oh) with lots of top stitching to rough it up. And then one in a piece of hand screen printed heavy cotton by a fab local company. Anyway, back to number 2...
Made up in the original grey cotton drill I had in mind before getting waylayed with the horsey in number 1, number 2 is a basic wardrobe staple, already worn several times. I figured it would work well with patterned or detailed tops, like the Wiksten tank above.
I did a bit more top stitching on this one than the last just to bring up the texture a bit. And I considered adding back pockets for more texture but decided against it - maybe something for the future. I also think it would look good with rivets or some sort of simple hardware. I almost wanted to go a sort of cargo skirt look but then decided to keep it simple.
As with my first version I took a bit out of the back seam and side seams at the waist, tapering to the hips. And after my admission of not being a particularly neat finisher last time I think this one came up OK, and I'm not so embarrased to show you the inside this time :-) And those zip flies get easier with each one I do, which makes the whole process more enjoyable and quicker!
And here's the skirt with a plain top, which I still think works OK, though I do feel a bit elephant-like in all that grey, hee hee!
A huge bonus about this pattern is that it is very economical with fabric, which I think is why I keep thinking "that would make a good Moss Mini!" when I see an interesting piece of fabric, even if it isn't large.
- - - -
Pattern Grainline Studio Moss Mini
Size 6
Fabric Cotton drill (mid weight) from Spotlight
Top (top pic) Wiksten tank
- - - -
Sunday, January 26, 2014
Mission maxi
The weather around the world has been particularly crazy lately, don't you think? Some days we are sweating it out here in Australia in 40c + (while you guys in the northern hemisphere are freezing your a's off in ice and snow). But then we get a cool snap and boom, the temperature is half of what it was just days before! So this year I haven't done my usual packing away of cardigans etc, because you just don't know what's around the corner.
One gap in my wradrobe that I'd identified at the start of summer was definitely very hot weather appropriate clothing, and particularly dresses, and if sometimes they could hide my not so summer ready legs then that would be good too :-) Hence I thought I'd give the famous and much-loved Jamie Christina Mission Maxi a go.
I used a cheap ($3 per metre) fine striped jersey as a trial. It sewed up well but when I'd finished I thought the shape was extremely bluuurgh on me. It looked like a nightie and went straight into the UFO pile :-( After all the examples I'd seen around I knew there'd be a danger of it feeling like a nightie, but I thought if I chose a fabric with the right drape and also belted it with my wide belt it would be OK. No. The belt just looked disjoinetd and cut me into 2 weird shapes. Hard to explain but not a great look.
So I promised myself to get it out one day and chop it into a singlet top. But then we hit one of those 40c+ days a couple of weeks later and I was desperate and thought I'd give it a try. With a few little adjustments I found it sat much better - I took the seam at the waist in carefully: too much and it was too squishy, not too little or it was too baggy and nightie-ish. And the addition of a big neclace, rather than a belt, helped to break it up.
I do like it now, and it doesn't feel so much like a nightie, but I've got to be in the mood to wear it... in all the reviews I read about this pattern I don't think anyone mentioned how careful you have to be with your underwear when you wear this one. Firstly I needed a racer back bra, which I don't own, so I bought one of these little gadgets and twisted myself up like a contortionist trying to get it on to the one bra that it fits onto. Then for the bottom half I only have one pair of undies that are sleek enough to not be seen under this. I have enough lumps and bumps around the hip area to not want to be adding more. And then I always feel I have to stand up straight, and suck my tummy in to feel I look OK in this... not the most relaxing dress to wear, though it looks like it should be!!
Maybe a darker/more drapey fabric would work better for this pattern. And I really like the godet and halter neck versions (though what bra could I wear for that!!). I'd like to try them one day, but at the moment I'm not inspired. Phew, it all feels a bit hard at the moment when I was hoping it would be easy. Oh well!
- - - -
Pattern Mission Maxi
Size 6 bust graded to 8 hips, with adjustments as above
Fabric Striped cotton mix jersey
Necklace self-made felt balls strung onto hemp thread
Hat Amy Butler Blue Sky Hat
- - - -
Tuesday, January 21, 2014
Workhorse Maritime shorts
Firstly, apologies for these boring boring pics. I view these shorts a bit like a functional car that gets me from A to B - it's useful and practical but doesn't set my world on fire. I don't mean to insult the designer in the slightest, it's just that I am not a shorts girl. I'm not exactly sure why, maybe it's that my legs are not my favourite feature (though I love my Moss Mini). Or maybe they just make me feel a bit too tomboy-ish: short hair + shapeless legs + shorts = boy? (but then there are some lovely feminine versions out there). I guess what I'm saying is that I didn't pretty these up as they are a practical item for me - for sitting on the beach building sandcastles, sclepping around the house on a hot summers day, digging around in the garden etc. But that's not a bad thing... I may not love shorts* but there's no denying how practical they are.
Anyway... as with the Moss Mini, I loved this pattern - it was a joy to sew. I made these for a weekend at a beach house with friends late last year and they were super useful and practical, just what I needed!

In situ on holiday with Polly top and Blue sky hat
I used a stash remnant of lighweight denim with a little stretch (first seen in this Belladone). As with the Moss Mini I took in the back seam quite a bit (is this like a 'sway back adjustment' I wonder?) and also the side seams slightly.
I enjoyed sewing the back pockets and thought next time I sew back pockets I may try a fun decorative stitching design (thinking of Mary Nanna here :-)
And here's something I feel a little nervous showing, the inside of the shorts. I am not the sort of sewer who prides herself on getting the inside finished beautifully I'm afraid, I'm more of the 'just get it done, I want to wear these!' sewer. But, as looking at others' inside pics of Maritime shorts & Moss Minis have been so useful I thought I should return the favour. And also I can show you that I did put something pretty in - the pocket lining is a sweet green quilting cotton and I also used coordinating green overlocking thread.
- - - -
Pattern Grainline Studio Maritime Shorts
Size 6
Fabric Stretch light weight denim from The Remnant Warehouse
T-shirt Mesop
- - - -
* Disclaimer: I do have to admit that my anti shorts stance is waivering when I look at all the lovely winter versions of Deer & Doe's Chataigne shorts styled cosily (like this)... I'm thinking of a pair in a lovely woolen fabric, teamed with thick tights, boots, merino wool top, scarf...
Anyway... as with the Moss Mini, I loved this pattern - it was a joy to sew. I made these for a weekend at a beach house with friends late last year and they were super useful and practical, just what I needed!
In situ on holiday with Polly top and Blue sky hat
I used a stash remnant of lighweight denim with a little stretch (first seen in this Belladone). As with the Moss Mini I took in the back seam quite a bit (is this like a 'sway back adjustment' I wonder?) and also the side seams slightly.
I enjoyed sewing the back pockets and thought next time I sew back pockets I may try a fun decorative stitching design (thinking of Mary Nanna here :-)
And here's something I feel a little nervous showing, the inside of the shorts. I am not the sort of sewer who prides herself on getting the inside finished beautifully I'm afraid, I'm more of the 'just get it done, I want to wear these!' sewer. But, as looking at others' inside pics of Maritime shorts & Moss Minis have been so useful I thought I should return the favour. And also I can show you that I did put something pretty in - the pocket lining is a sweet green quilting cotton and I also used coordinating green overlocking thread.
- - - -
Pattern Grainline Studio Maritime Shorts
Size 6
Fabric Stretch light weight denim from The Remnant Warehouse
T-shirt Mesop
- - - -
* Disclaimer: I do have to admit that my anti shorts stance is waivering when I look at all the lovely winter versions of Deer & Doe's Chataigne shorts styled cosily (like this)... I'm thinking of a pair in a lovely woolen fabric, teamed with thick tights, boots, merino wool top, scarf...
Thursday, January 16, 2014
Horsey Moss Mini
Sometimes it takes me ages to think of a good pairing of fabric and pattern (I'm looking at you, Anna dress!) but other times they just seem to find each other almost by themselves, without any help or thought from me :-) That's what happened with this horse print fabric and the Grainline Studio Moss Mini recently.
I'm a recent convert to Grainline Studios patterns. I wasn't that interested in the Moss Mini when it first came out but then I started to see all the great versions around (as you do) and started thinking about how I could use some basics in my wardrobe. I had a rather sedate dark toned drill cotton in mind when suddenly this horse print duck cotton from Spotlight jumped out at me.
The Moss mini was a joy to sew, such a well drafted pattern with such well written instructions. I made just a couple of alterations. I had to take in the back centre seam a little to make the waist sit better but this was easy to do. I tried the skirt on after inserting the zip and before I put the waistband on. The waist was gaping a bit and I knew from past experience that if I didn't fix this the skirt would never sit right and keep twisting around as I walked. There's nothing more annoying! I fixed it by just taking the back yoke seam in a little, tapering down to the centre back, and also taking the side seams in slightly too.
I didn't bother to try to match the horse print as I thought it wouldn't really matter and I thought I may run out of fabric (and I'm lazy). Consequently I have ended up with a two-headed horse and also a bottomless horse at the front seam - oh well :-)
I really love the details of this skirt:
: : the pockets are a generous size, and they are anchored to the centre seam so they don't move around annoyingly
: : The pockets are desinged to sit out a little to give your hands space (as pictured above)
: : The back yoke allows for a really nice fit. With a simple shape like this fit is so important
: : The fly and waistband are constructed really nicely. This was only my second time inserting a fly and it turned out well despite my slight case of nerves (and yes, the instructions for this are as straightforward as everyone says they are)
I'm really happy with my horsey mini, I've already worn it several times since making it in the new year. And I like occassionally making something a bit quirky and fun! My kids remark on my 'horsey skirt' each time I wear it :-) Having said that, I also have another Moss Mini in the works, this time the original plain drill fabric I had in mind when I bought the pattern. It will be good to have a basic too.
- - - -
Pattern Grainline Studio Moss Mini
Size 6
Fabric Cotton duck (mid weight) from Spotlight
Top Self-made Papercut Patterns Sloppy Josephine
Cuff Self-made
- - - -
Next up I want to show you another Grainline project. Can you guess which? Are you a Grainline fan too?
Saturday, January 11, 2014
Sewing plans for 2014
OK, it's confession time... Last year I bought a lot of patterns. So many in fact that I don't want to count them for fear of the total! (closes eyes tightly). I do feel good about supporting indie designers (all but 1 are from them). I bought patterns from Sewaholic, Victory, Deer & Doe, Grainline Studio, Figgy's, Papercut Patterns, Green Bee, Jamie Christina and Leisel & Co. Some of them reasonably expensive, others very reasonable... BUT, I don't want to keep buying in 2014, or at least only in special circumstances*.
So my goal for this year is to reuse my patterns. Most of them I would definitely like to make again - I think I'm getting better at choosing for my style, shape and lifestyle rather than what looks good on others. And I like the thought that each time a pattern is used you get more value from it ;-)
A couple of the patterns I bought last year I haven't made up yet, so these are on the top of my summer sewing list:
A Sewaholic Saltspring:

Grainline Studio Lakeside Pajamas:

And By Hand London Anna Dress:

And at the moment I'm also thinking:
: : I need some summer arm covering tops, maybe using my Make it Perfect Shearwater Kaftan pattern
: : Another Simplicity 2226 skirt, these are such great staples
: : And for cooler weather a couple of Moss Minis in velveteen or Corduroy ( I have my first Moss Mini to show you next up that I made just after new year).
* Now if I am good and reuse patterns and use stash fabric where possible, I may grant myself this lovely shorts pattern by Deer & Doe for winter as it is sooo lovely and I have some grey wool that they'd look fantastic in, so really it would just be the cost of the pattern :-) (sounding like a true addict).

Now please tell me you bought a lot of patterns too in 2013 (or not!)
So my goal for this year is to reuse my patterns. Most of them I would definitely like to make again - I think I'm getting better at choosing for my style, shape and lifestyle rather than what looks good on others. And I like the thought that each time a pattern is used you get more value from it ;-)
A couple of the patterns I bought last year I haven't made up yet, so these are on the top of my summer sewing list:
A Sewaholic Saltspring:
Grainline Studio Lakeside Pajamas:
And By Hand London Anna Dress:
And at the moment I'm also thinking:
: : I need some summer arm covering tops, maybe using my Make it Perfect Shearwater Kaftan pattern
: : Another Simplicity 2226 skirt, these are such great staples
: : And for cooler weather a couple of Moss Minis in velveteen or Corduroy ( I have my first Moss Mini to show you next up that I made just after new year).
* Now if I am good and reuse patterns and use stash fabric where possible, I may grant myself this lovely shorts pattern by Deer & Doe for winter as it is sooo lovely and I have some grey wool that they'd look fantastic in, so really it would just be the cost of the pattern :-) (sounding like a true addict).
Now please tell me you bought a lot of patterns too in 2013 (or not!)
Thursday, January 9, 2014
Top 5 of 2013
I thought about doing a full review of what i made last year (as in previous years) but the thought of all that Photoshop work compiling everything was giving me a headache! So I'm following others' lead and doing a Top 5 of 2013' post. Much more sensible, methinks - there's sewing to be done tonight!!
OK, in no particular order, my favourite sews of 2013...
Deer & Doe Belladone dress
I made 3.5 of these dresses (the .5 was a fail), this one is my favourite.
Megan Neilsen Briar tops
Such a simple design but such a lovely fit. Good in plain old jersey or merino wool. I also adapted the pattern to a cardigan (unblogged) and made a bright magenta version (seen here during Me Made May).
Victory Patterns Ava tops
I looove my silk version (on the left), though haven't had much opportunity to wear it. The muslin, though (on the right), has had plenty of wear, even though it's not perfect. I just love the shape and feel of it.
Wiksten tanks
I have several of these now and all get worn to death.
'A Day in the park' bag
Such a satisfying project and such a useful bag.
Next up I'm hoping to outline my ideas and challenges for 2014. After I finish my latest sewing project of course :-)
Friday, January 3, 2014
Ruffle top - Happy Homemade Kids Vol 2
Hello and happy new year! I'm hoping to do a bit of a review of the past years craft, but in the meantime I wanted to try to get through the backlog of things that I have made but haven't blogged...
This sweet little top, made for my little girl (middle child) is another pattern from my copy of the Japanese pattern book Happy Homemade Kids Vol 2. It's the third pattern I've made from this book (others here and here) and I do like the style of the book, though I think you need a reasonable amount of sewing experience to use it as the descriptions are brief and assume a certain amount of knowledge.
My girl chose the fabric herself on a trip to Spotlight with me and her sister. I had to have a little laugh to myself at how reflective of their personalities both my girls choices of fabric were :-) This little firecracker of a kid chose this unusual bright teal coloured fabric shot with silver metallic threads, while her sister chose a sedate floral cotton :-).
It was a strange fabric to sew with as when it was ironed the metallic threads sort of kink with the heat then need to be straightened out again. It behaved unpredictably but ended up quite sweet and full of personality... hmm!
I'm considering adding another tier to the top though as it's a bit short, but she loves it. And I'm strangely looking forward to seeing what her next choice of fabric will be...
Subscribe to:
Posts (Atom)


