
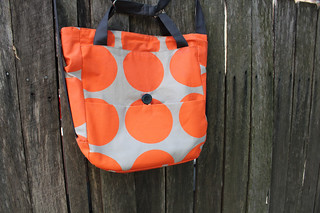
So when I came across Oliver & S' A day in the park bag pattern it looked perfect. I think this pattern was released in 2010 but somehow hadn't come onto my radar.
I had specifically been looking for a bag to take on a school excursion I was going on with my middle child who's in kindy. And anyone who has been reading my blog for a while will know that I'm like a dog with a bone when I get an idea, needless to say this was put together at the 11th hour, but I was so glad I did as it was fantastic on the excursion. See, I'm finding ways to justify the sewing mania :-)
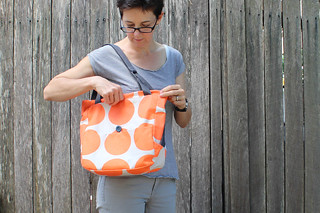
In case you hadn't heard of it either, it's basically a tote bag that you can also use as a backpack. You just pull the straps...
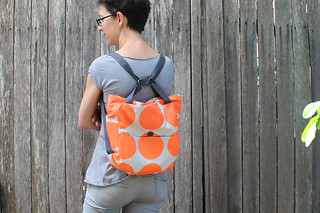
and et voila, it's a backpack. Ingenious!
I really loved making this pattern. As you may know I have made plenty of bags in the past and consider mine are reasonably good, but this pattern is such a cut above my efforts. All the little finishing touches make it look so professional, so its practical as well as not looking homemade (which we know is a curse, right, as opposed to handmade :-)
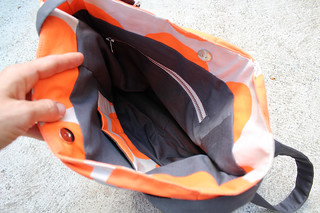
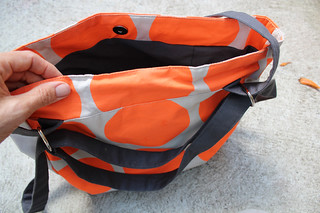
I used a heavyish mid weight cotton dot print fabric for the outer (about $3 worth at Spotlight - yay!) and a dark grey cotton for the lining. I used stiff interfacing as I wanted it to have some body and not slump down, and also interfaced the straps to give them a bit more strength. Annoyingly I couldn't find O rings for the straps, so had to use the closest I could get, and also couldn't find rivets, which definitely would have finished it off even better. I may try to find some online to add.
The only change I made to the pattern was to widen the side panels, as quite a few people seem to have. This definitely made it more practical for my needs.
This bag has already had several outings (and is less than a week old) and lots of favourable comments from people, including a few from friends with sideways glances and the familiar 'did you make that?' question, which I'm sure they regret asking when I start to rave about how much I love it :-)


Wow - I've never come across this pattern either - your fabric choice is perfect!!
ReplyDeleteAwesome bag. I was only eyeing the pattern off last week! I like the versatility of converting to a backpack. Colours are great.
ReplyDeletethat is one gorgeous bag you've got there! And I'm a tad jealous of your $3/meter score - love that polka dot fabric! Thanks for the pattern review too - sounds like a winner!
ReplyDeleteThis is gorgeous, Jo!
ReplyDeleteTotal coincidence - I'm just about to make this bag (also for a school excursion) - trying to finalise my fabric choices (attempting to make it from my stash). Did you use the canvas, or just heavy interfacing?
Very snazzy!
ReplyDeleteI am still slowly working towards making a bag bag. In fact I bought interfacing and padded interfacing at Spotty the other day. Not sure if either is right, in fact probably not! Couldn't believe either that in that huge store they didn't have proper bag hardware.