Showing posts with label holiday sewing. Show all posts

Monday, December 12, 2011

Teacher gifts


This year we've been so lucky with my girls' preschool and year 1 teachers (which makes me a bit nervous for next year - surely our luck has to run out soon?), they've been dedicated and attentive, getting the best out of the girls.

I decided to make the female teachers a little zip purse each to say thank you (the male teacher gets a hand made card and a "Mr Men" book to add to his collection :-).


For this one I used a piece of a fabric I fell in love with at Spotlight recently, but have yet to decide what to make with it - probably a dress of some design. I love the Ikat design, with it's vibrant colour (hard to photograph) and cute geometric yet soft pattern. I lined it with a heavy grey cotton, used a chunky metal zip and finished it with a little ribbon for the zip pull. I wish I had time to do a matching fabric zip pull, but ah well, at least it's done and ready to be wrapped, one thing ticked off the Christmas list.


Sometimes I wish I was my cat Sausage... he gets to sleep all day. But then, he can't sew, so maybe not ;-)

• I realised recently that I still have not done a tutorial for these little purses, as I said I would, so I'm earmarking January for that.

How's your holiday making/buying/creating going?

Thursday, January 6, 2011

Oven mitts - back on the gift list


After saying I wasn't going to make oven mitts as Christmas presents as they were fiddly, I decided to anyway and made one pair each for 2 of my sisters-in-law. What I didn't do (but had been part of the plan originally) was to print my artichoke print onto linen and use that to make the mitts. Just a tad too ambitious for my Christmas list!

This first one is made from an Ikea cotton bird print that I thought was a little humorous and might amuse the recipient, sis-in-law A. I had that lovely (though scary!) feeling of anticipation when she commented to me on Christmas morning, while putting her turkey into the oven, that: "I really need new oven mitts!". Little did she know what was inside her present under the tree, hee hee! So obviously watching her surprised face when she opened her present a few hours later was one of the highlights of the present opening :-)


For the outside I used an Ikea cotton print fabric, bound the edge (grr, not fun!) and made a tag with an oatmeal coloured linen, and for a little extra personality I lined them in a bright orange thick cotton.

For sis-in-law B I used "Gunilla" Ikea fabric, which she'd seen on the chair I recovered and commented that she'd liked.


As with the other pair, I did my haphazard machine quilting around whatever shapes I thought would suit it, which was really fun, then bound them again in the linen. I also used that linen for the reverse side of this pair and did some quilting to visually mirror the pattern on the other side.


Aside from the tricky bits again (binding, curves, turning inside out with lots of bulk) I did enjoy making these, not least because I imagined them being used and enjoyed (fingers crossed!).

Monday, January 3, 2011

Hand printed tea towels


I totally fell in love with stamping during my Christmas preparations. I stamped everything. If you came to my house and stood still long enough you were in danger of being stamped yourself! After printing some Christmas wrapping paper I suddenly thought of my huge roll of linen and knew it would make great tea towels, trivets, table runners and oven mitts (more on those later). I could design my own little stamps, cut and print them, sew the fabric and voila, Christmas presents!

Well, it didn't quite go like that of course!! For my first design I'd decided on trying an image of an artichoke, one of my favourite foods of all time. The first few stamps I made were awful. The line work was terrible and the design was just all wrong. So I sketched and sketched, thought about it some more, then dragged all 3 kids to art shops til I found a good cutting tool and bought extra supplies of the rubber cutting mats. Then I couldn't find the right colour fabric paint so had to buy several colours to mix, needed to work out how to make a stamp pad for fabric paint, kept getting patchy prints from my stamps, and on and on... you get the picture.


On the verge of giving up, it finally all came together and I ended up with some tea towels I was pretty happy with. Wow, it seems so much effort now I look back on it - I guess every new craft venture is a steep learning curve.

The first tutorial I found invaluable was from the very talented Gennine's art blog, tutorial here. And the second was from the excellent jezzeprints blog. It was invaluable for learning how to make a stamp pad (and for tips about all sorts of detail). You can find her tutorial here. Jesse makes the most beautiful prints. I am in awe.


So here are some of the patterns I made with my beloved artichoke. I did some in white (forgot to photograph) and some in green, and added the red twill tape as a nod to the Christmas season.


My favourite design turned out to be one I came up with in the small hours of the night before we were going away for Christmas (hastily ironed and tumbled dry to fix the ink!). Isn't that always the way, inspiration at the last minute! An artichoke Christmas tree, topped with a white star :-)


And here's one packed up and ready to be posted to a dear friend who I worked with for a number of years who I know will 'get it' :-)


It was fun coming up with the different designs but not really so much fun doing all the printing as it was so laborious and time consuming. The design part of the process was definitely my favourite bit!

There are a few dodgy tea towels lurking around on my sewing table that didn't make it to friends and relatives due to their gross imperfections. I hope to put that frustratingly gathered knowledge to use and overprint some in the hope that I can save them from the scrap heap. Wish me luck!

Wednesday, December 15, 2010

Oven mitts - off the gift list


Recently I finally got around to making an oven mitt to match the aprons I made a while ago. The state of the only oven mitt in the house was pretty dreadful but I think I found the thought of making a new pair a bit daunting. However I wanted to make them as presents so thought I'd make one as a test run.


Taking pointers from tutorials like this one, first I traced a pattern from my existing dying oven mitt, then cut out 2 in the blue and green fabric for the outside, 2 in a white linen/cotton blend for the inside, and 2 in heat-proof batting. I sandwiched a piece of that between outer and inner pieces of fabric then machine stitched through the layers.


Even though I do a lot of sewing, I have never tried to make a quilt - it's sitting as an idea in the back of my mind but I haven't been brave enough to attempt it. But this kind of mini-quilting-like sewing was really fun, and I thought even the inside looked kinda cool...


Anyway... I then did the same to the other pieces, overlocked (serged) the 2 finished panels together, turned them inside out and bound the bottom edge in a scrap of green linen I had lying around. Binding is not my favourite sewing technique because I find it hard (impossible) to get just right, though I love the way it looks when it's done well.

It turned out OK and has a mate sitting half finished (ready for 'Half finished Projects January' :-) And it performs its duty well, but was a bit of a pain to make really, so it's off the xmas gift list, at least until next year when I've maybe had more practice.

Monday, November 1, 2010

My little ghost


When I was growing up Halloween was not (I think) widely celebrated in Australia. So I admit that it's taken me a while to get into the spirit of it, but this year I really enjoyed it. The girls dressed up and I took them first to a party, which was raising money for a fabulous charity to build a children's hospital in Sierra Leone, and then on to a little trick or treating. We also made spooky cupcakes to take to the party (no pics sorry) and put a few decorations at the front of our house to signal to children and their parents that we were in on the fun and games. And of course we prepared a basket of lollies to offer to trick or treaters!


My small girl wore this ghost costume that I made last year for the big girl to wear to a party. The big girl had let me paint her face too so looked the part, but the little girl is not so keen on face paint, so I let that one go (reluctantly :-)


I knew exactly the design I wanted to do and it actually came together well so was a real joy to make. I cut 2 almost full half circles from a piece of white cotton...


then added a hood (taking the shape from a hoodie pattern I had)...


put a velcro closing on one shoulder for ease of dressing...


and sewed some elastic into the arm bands to help keep them down. This also meant that when her arms were raised it lifted the sides of the costume out creating a more ghost-like shape.


The I painted the 'boo' on freehand in black fabric ink, and attached a plastic bat and spider with a few stitches so they could be removed for washing.


I also had to include a pick of one of the big girl's classmate's lanterns. It was so pretty that I'm inspired to make one for next year.

So apart from having 3 small children restlessly sleeping with piles of sugar in their bodies by the end of the night (the baby got into the lolly bananas while we weren't looking), it was a really fun evening and I'm so looking forward to next year! Hope you had fun too.

Thursday, October 28, 2010

DIY t-shirts


OK, this t-shirt doesn't look like an exciting thing to sew but it kind of is to me...

I've been thinking about how elusive the right t-shirt is to find. You know the one - clings in the right places, good fabric, right sleeve length, right colour, good neckline etc etc. Even though t-shirts are a wardrobe basic, especially for me being a stay at home mum, it's still hard to get a really good cut and style, something that's flattering and easy to wear.

It hit me recently that rather than trudging around the shops (which I hate these days, particularly with littlies in tow!) looking for the right cut, it might be possible to make it myself once I have a good basic fit. So I decided that I would take one of my 2 or 3 t-shirts that do fit well and draft a pattern from it. The intention is to tinker with it until I have a really good basic shape that I can then adapt into all sorts of variations.


With that in mind I raided my stash for a stretchy knit, choosing this fine black and white striped jersey that I got on sale for $2.50 a metre. Bargain! And even though I always hate to waste fabric (you should see my 'scraps' box!), at least it wouldn't be costly this way.

Then I chose my beloved but ageing old white Kookai boat-necked 3/4 sleeve t-shirt to draft the pattern from, lengthening the sleeves. This is the result, no hemming or alterations done, just 4 pieces of fabric stitched together, an OK start. Some adjustments to make, and some techniques to learn, like how to do a neckline without it stretching, but at least the basic shape is there. So, a few tweaks to come, then to have some fun...


Simple shapes that seem to suit me (I think?): boat necks, cap sleeves, bell sleeves, curved hemlines.


I've been drooling over this top (and most of the other clothes!) by the very talented Etsy seller Gaia Conceptions for ages. I've always loved a keyhole detail and can't wait to use the fine black wool jersey in my stash for a top featuring ties & keyholes. Hmm, methinks this shouldn't be the first adaptation I try. And better be prepared for the possibility of lots of unpicking!


And one of these very cute kimono tops from a free pattern by a Burda Style member - apparently cut from just one pattern piece and having only two seams. I'm intrigued. Thinking of a fine cotton/nylon midnight blue recently purchased from this sale.

Do you have a favourite t-shirt? Is it just me, or are the right t-shirts hard to find?

Monday, September 20, 2010

Gone and back


We're back from our holiday! Short but sweet.

A few things I noted:
• It's impossible to get tired of watching sunsets on tropical islands
• Having a massage really is one of my very favourite things in the whole world
• Not cooking, cleaning, or doing the usual routine for a week is bliss
and:
• Even 4 hours is a long time on a plane with 3 children under the age of 6
• Toddlers take their tantrums with them on holidays
• The above point is made considerably more bearable once a pina colada is consumed, preferably poolside (responsibly of course :-)

But overall we are extremely lucky to have such a lovely holiday away with our little brood.

Here are some quick holiday pics. I'm itching to get into my 'Kids Clothing Week Challenge' so will keep this short... a couple of holiday pic sets to come later in the week...


The 'Sophie tunic' comes in handy for some crab hunting and racing, not to mention a game of 'crocodile, crocodile', where the multi colours worked for her!


Who me, tantrums?? Surely all is forgiven with this cute pose, mama!


The hotel joined in my long lasting pink and green fad by supplying gorgeous green beach towels... hmm, thoughtful


Gotta get that craft fix in their somewhere! Little bag made by the very clever pool weaving man with skills passed down from his grandmother. Big girl collected shells in it until the customs man took it in Sydney.


What do you do when you're on holiday, the littlies are napping and you're desperate to 'make stuff'? Some origami crane making does the trick. Seen here nesting in another of the clever weaving man's baskets.

Tuesday, September 14, 2010

Holiday sewing over! Now for the holiday...

Phew... holiday sewing was officially over yesterday at lunchtime, and I've got to say I was glad to pack it all away! I did end up spending a few too many late nights sewing when I probably should have been doing other stuff... fun stuff like cleaning. But I really enjoyed it and I'm sure my sewing skills have improved. I learnt a lot from the patterns I made and it's given me confidence to do some things I thought I couldn't. Ican't wait to do some more - after a break!

Here's the list and what we ended up with:

For the big girl:
- 'Sophie tunic' kaftan to cover up from the sun yes
- messenger bag to carry her things on our adventures yes
- a pair of shorts "Can I have shorts please Mama? Shorts, a shirt and a bag". OK then. Does anyone have any ideas for girls shorts? She has been obsessed with skirts and dresses for so long that this has thrown me! no. improvised by cutting the legs off an old pair of jeans and hemming them with some spotty fabric
- ruffle top

For the little girl:
- ruffle top yes, too cute!
- popover dress "I want butterflies Mama, and spiders" Hmm, will have to see if I can find a fabric with butterflies and spiders - wish me luck! no, didn't get this done, sorry little girl, maybe for summer. I did find lots of pretty things to take in the girls clothes stash though :-)
- messenger bag yes

For the baby:
he doesn't really need anything but can't be left out, so:
- a sun hat no, we'll use the lovely one that Crafty Deb made him
- shorts/trousers monkey pants made - my new favourite!

plus a hat and a beach bag

- - - - - - -

http://d1yops4utenhgf.cloudfront.net/kcwc_fall_button4.jpg

Coincidentally, Elsie Marley is having another Kids Clothing Week Challenge starting very soon. I'm really keen to give it a go after my own little challenge, but this time to share with the KCWC community. Would you like to join me? Come on, you know you want to!

OK, we're off now for the much needed holiday! I'm hoping for lots of playing with the kids, swimming, playing games, reading, and a bit of relaxing too. I'll be back here some time next week :-)

Monday, September 13, 2010

Matchy-matchy


When I was little I remember mum making she and I matching strapless sundresses. The fabric was a lightweight cotton with a large red and white rose print. There was elastic at the top and waist, the hem was just below the knee and there were splits up the sides. They obviously made a big impression on me. Skip forward probably about 30 years and I'm making my first matching (kinda) outfit with one of my girls.


My girl asked for a 'pretty top' when she saw her sister's the other day, saying that they needed matching tops to go to dinner in when we're on holiday - and how could I refuse that request :-). She was fascinated with the gathering and asked me how to do it (a little fellow sewist in the making maybe?). But I was out of the 'lala' fabric, and while I would have loved to whip out for some japanese echino double gauze, unfortunately something from the stash would have to do. She chose this lovely orange and red graphic print voile that I got from my favourite fabric shop a while ago. It is so soft that I knew it would work well on the floaty 'Ruffle top'.


I'd used the fabric earlier in the year to make a 'Shearwater Kaftan' from Make It Perfect, and loved the kaftan so much that I bought more fabric with a view to adapting the pattern to a dress and maybe cutting it on the bias to further the drapey quality.

So now she can take her pick and match her sister or me :-)

Ok, back to my packing!

The Sophie Tunic beach cover-up (with ladybirds)


Here's the 'Sophie tunic' that I finished on the weekend for the big girl. Her little sister has plenty of nice clothes suitable for the beach and sun but my big girl seems to have grown out of everything lately, as you do when you're little.


I had in mind a beautiful soft spotted fabric for this tunic but she had other ideas, but when she saw this fabric that I'd bought to make a skirt for the little girl she loved it. There are flowers, butterflies and ladybirds - what more could a girl want :-)? So the shirt's turned out a lot more cutesy than I'd intended, but she loves it, and that's the important thing. I tried to temper the busyness of the print with the contrasting trim and set the facing on the outside to make it a focus - the pattern for this top includes different sleeve lengths and facing inside or out, so you could get quite different looks from the one pattern.

The pattern itself was easy to understand and enjoyable to make and has a good level of finish so I feel I can just throw it into the washing machine and it won't uinravel (unlike some other things I've made!).


Final holiday sewing project to show later today hopefully!

Saturday, September 11, 2010

Pretty top with lala's


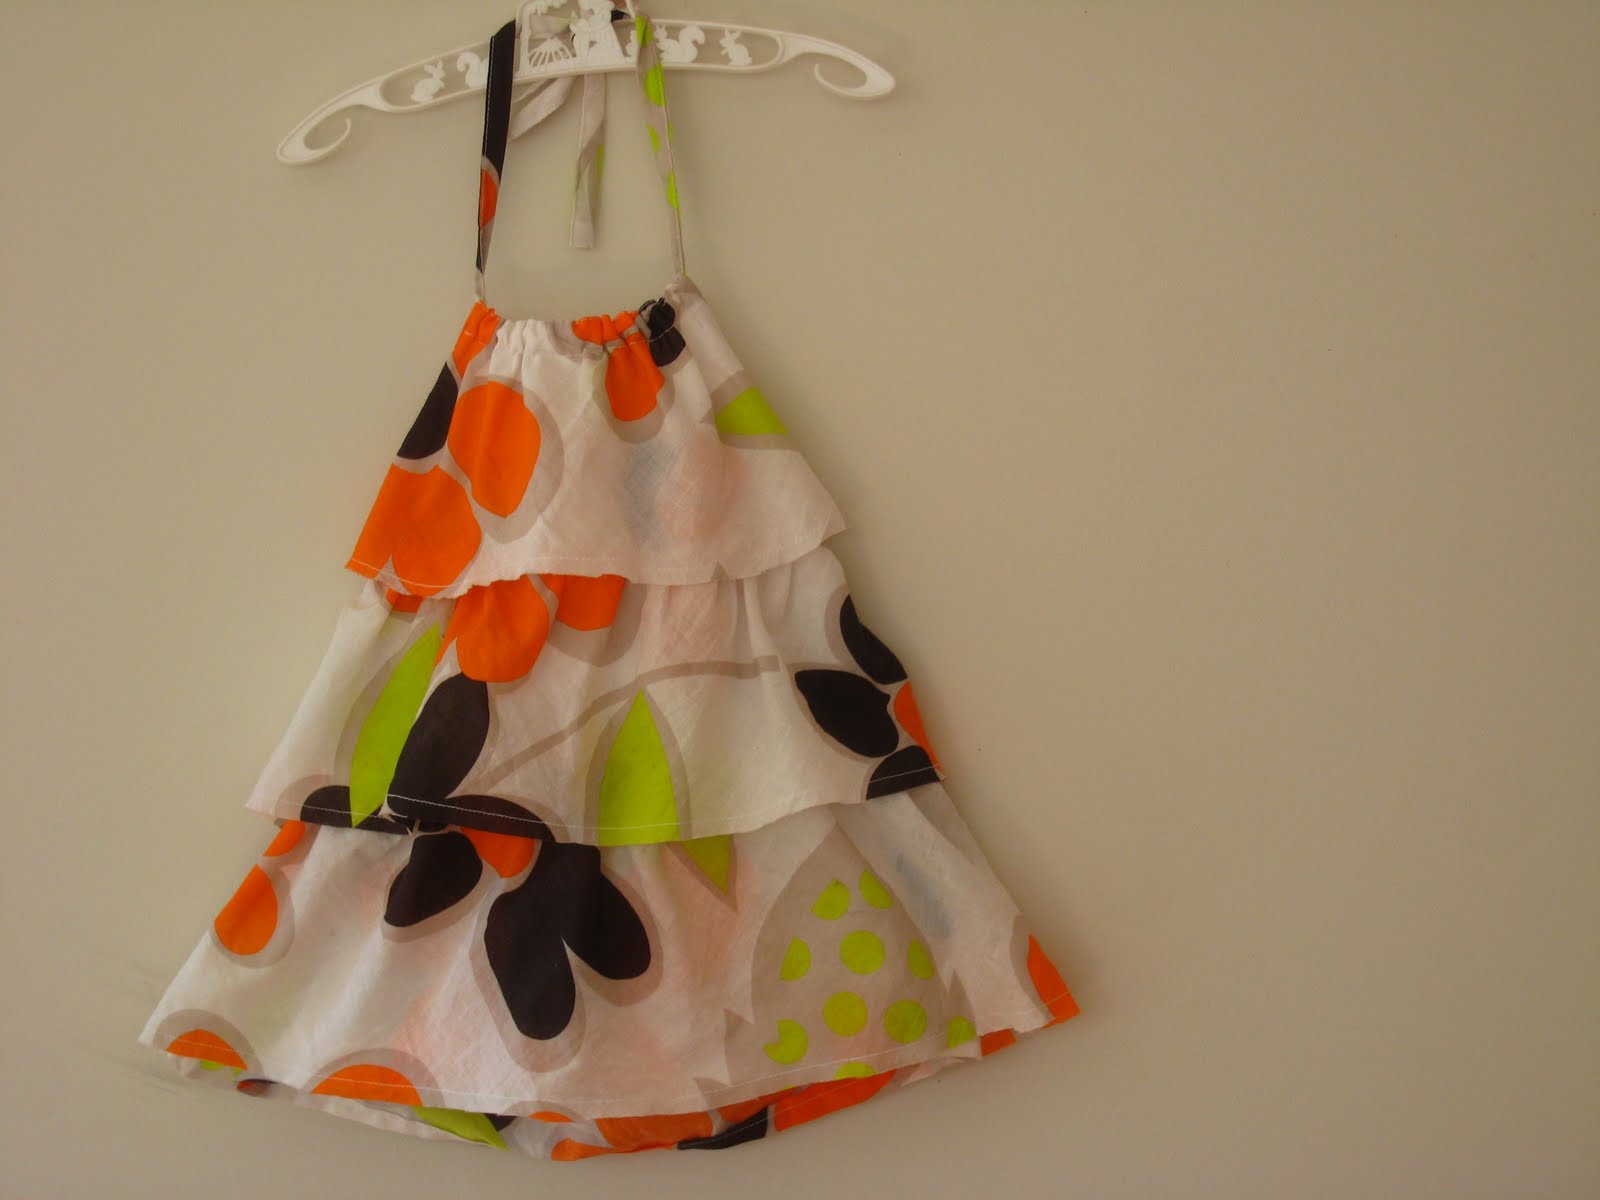
There's been a bit of rivalry here during 'holiday sewing' for mama-made items - whenever one of the girls has seen me making something that was not for them they'd ask what about theirs? And since she first saw the Ruffle Top pattern and fabric laying around, my little girl's favourite phrase has been "where's my pretty top with lala's (flowers)?" I was able to put her out of her misery this morning (after a late night!). Here it finally is...

When I saw this pattern I knew my little girl would love it - very girly and floaty, as is her want at the moment. And the contemporary floral voile works well with it. I bought the fabric years ago, just because I liked it. I find I'm never sorry when I do this because sooner or later that fabric you love finds the perfect project and turns into something you love :-)


The detail is just so cute on this top and I really enjoyed making it. It was hard to photograph it in a way that showed it properly so I'll endevour to get some good action shots of little girl on holiday to show off those gorgeous ruffles. If you like the style I'd urge you to make it. Hey, and the pattern's free (go to link above to download it)! Those Oliver+S people are so generous.


Now, the only problem is that the big girl loves it too and has said how much she'd really love one of her own "so we can wear them together when we go to dinner, Mama". Pass the matches for my eyelids please, someone. I can feel another late night coming on...

Friday, September 10, 2010

Hat in a hurry


After nearly knackering my sewing machine the other day sewing through 8 thicknesses of heavy cotton with a fine needle (hmm) for the girls' bags, an emergency visit to the sewing centre was in order this morning. The lovely repair man is now my best friend after patiently sorting it out for me. With my holiday sewing list still going I could not have my old buddy Singer 201k (1956 model) give up on me now!

So, tail between my legs and armed with 4 new packets of needles in varying thicknesses (?), we headed home. While the boy slept and the little girl painted and drew I made this hat for myself. I do already have a sun hat, made last summer from this Amy Butler pattern, but it's in a really strong print that clashes with most others, and also I felt like a change.


Peek-a-boo

After Crafty Deb made my boy a lovely little hat and t-shirt combo when he was born, I bought a copy of the pattern for the 'Lazy Day Hat' from the fabulous company Make it Perfect. There are 4 different sizes in the pattern, from a size that fits a small child up to a larger adult. I enjoyed making it, though speeding along trying to beat the clock in nap time is maybe not so wise. I love the fact that it's reversible, and as I've used a plain colour it should be pretty functional.


It's always more fun to wear someone else's hat than your own

And here's the groovy boy version from CD. Love the print.


Enjoy your weekend. I have a couple of patterns with fabric all cut and ready to sew (that's the tedious bit, right?), hopefully I'll show you over the weekend. Wish me luck :-)
Related Posts with Thumbnails