Showing posts with label recipe. Show all posts

Wednesday, April 17, 2013

Chocolate zucchini brownies (egg-free)

Last weekend I was lucky enough to again be included in a share of the proceeds of a friend's early morning trip to a local market. I love the fact that everything is so fresh (and cheap!) and also the challenge of using everything without waste.


At first it can be a bit daunting looking at all that lovely produce and wondering where and how to store it and use it wisely, but I've done this a few times now and have a method: divide produce into things that need to be used quickly (like spinach and ripe stone fruit) and those that will last a bit longer stored in a cool place (like pumpkin or a whole watermelon). I then think of recipes to use most of it and make up a shopping list of groceries to go with the list (eg. dried pasta, legumes, condiments etc). It's very satisfying, in a nerdy kinda way :-)

This time, amongst the goodies were a heap of zucchinis (courgettes). We have a couple of favourite savoury zucchini recipes, including this 'green pasta' and zucchini fritters with garlic yoghurt (Bill Granger recipe), but I also wanted to make a sweet recipe. I remembered hearing that zucchini goes well with chocolate (what doesn't go well with chocolate?!!!), so searched and found a couple of egg-free recipes that my allergic big girl could also eat.

The recipe I tried is for a cake but I've renamed it a brownie as I think it's more brownie-like with its dense texture and deep colour. And I'm thinking that next time I might substitute some brown sugar for white to add to the brownie-ness :-) But for now I thought these were pretty good - not overly sweet, but tasty, quick and easy. And hey, hidden veggies in a dish kids love always makes a mum feel good, right?


Chocolate Zucchini brownies (recipe from the la receta de la felicidad blog here)

300 g grated zucchini

125 ml vegetable oil

200 g sugar

250 g flour

50 g cocoa powder

1 tsp baking powder

1 tsp vanilla extract

1 pinch of salt


Preheat oven to 350º F (180 º C)

Line a 20 x 20 cm baking tin with baking paper.

In a large bowl, mix all ingredients with a spoon. Batter will be thick (see pic below).

Spoon into the tin and bake for 20-25 minutes. Remove from oven and let cool completely. Dust with icing sugar if desired.

Sunday, September 2, 2012

Weekend cooking: Beetroot brownies

The weekend's a time when I sometimes get the opportunity to cook something different or fun, a change from the quick and easy routine of weeknights. Come and see what I've been up to this weekend.. 


We were invited to a party this weekend (grown-ups and kids) and a friend and I took along dessert for the kids. Before the party we had fun thinking of all the different things we could make. Meringues had been on the top of my list (my big girl was away so no allergies to cater for) when suddenly as I was flicking through a cooking magazine I saw a picture of brownies containing beetroot and I was sold - and found a little amusement in the fact that I would be serving up a hidden vegetable, hee hee ;-)


I've been wanting to try a choc/beetroot recipe for a while and am so glad I did. I'm not sure if the kids were that over the moon about them but I thought they were delicious - moist and chocolatey but with that beautiful earthy flavour that comes with beetroot, and a lovely deep pinky/red colour instead of the usual straight brown.


And of course I had to do a little decorating... for the stars I put some icing (powdered) sugar into a tea strainer and shook it over a coffee decorator stencil thing. Which was the most fun of the whole thing really - apart from eating the few that didn't fit on the plate and stayed at home ;-)


*And by the way, happy Fathers Day today to all the fantastic dads!


- - - - -

Beetroot brownies

500g whole raw beetroot
100g butter
200g dark chocolate (70% cocoa)
1 tsp vanilla essence
250g caster sugar
3 eggs
100g plain flour
25g cocoa powder

Wear a pair of rubber gloves to stop your hands from staining, then top, tail and peel the beetroot. Roughly chop and put into a large bowl. Add about 1/4 cup of water, cover with cling film, then microwave on High for 12 mins or until tender (you could also bake the whole unpeeled beetroot until tender then, when cool, rub the skins off).

Heat oven to 180c and line a 20 x 30cm baking tin with non-stick baking paper. Roughly chop the chocolate and cut the butter into cubes then put them into a food processor along with the vanilla essence. Drain the cooked beetroot  then add it to the food processor and blend until the mix is smooth. The chocolate and butter will melt as you do this.

Put the sugar and eggs into a large bowl, then beat using an electric hand whisk until thick, pale and foamy, about 2 mins. Spoon the beetroot mix into the bowl, then use a large metal spoon or a spatula to fold it into the whisked eggs. Try to conserve as much air in the mixture as you can. Sift in the flour and cocoa powder, then gently fold these in to make a smooth batter.

Pour into the prepared tin and bake for 25 mins or until just risen all over. Cool completely in the tin, then cut into squares.


Thursday, August 23, 2012

Amazing orange cake

In my creative space this week there are a heap of unfinished projects...  I'm solo parenting so I'm just grabbing bits of time here and there where possible (and trying not to go to bed too late!). I'm working on my big girl's costume for the Book Week parade, some stock for my shop and a new bag prototype  amongst other things. But one thing I have finished this week are these delicious cupcakes and I'd love to share the recipe with you.


I feel justified in naming this recipe 'Amazing orange cake' for several reasons:
1. It's allergy free
2. It doesn't taste like it's allergy free ;-)
3. It's quick & easy (honestly!), no mixer or fancy gadgets required, except maybe a zester
4. It's delicious!


I've seen the recipe around on a few different blogs and pinned this one recently, but apparently it originally come from The Joy of Cooking. I've made both a cake and cupcakes from the recipe so far and they're both great.

I made the cake version at my mum's house and she brought out a jar of preserved orange peel that she'd made recently. We poured some of the syrup over the hot cake and then sliced the peel and put it on the top. It finished it off beautifully and I got to bring home a jar of the peel (thanks mum!). If you are after a recipe, Abby from Things for boys has a lovely looking one here.


- - - - - -

Orange Cake

1 cup sugar
1 1/2 cups plain flour
1 teaspoon baking soda (bicarb soda)
1/2 teaspoon of salt

1 tablespoon of orange zest, finely chopped

1 cup orange juice, freshly squeezed (about 2/3 oranges)
1 tablespoon vinegar
1 teaspoon vanilla essence
1/3 cup vegetable oil

In a mixing bowl combine all of the dry ingredients with a whisk.

Then in a seperate bowl or jug combine all of the wet ingredients and the zest. Add the wet to the dry ingredients and whisk until smooth.

Put into a small cake tin which has been lined with non-stick baking paper (this cake sticks if you don't use paper!). Cook in a moderate (180c) oven for around 25/30 minutes or until a skewer inserted comes out clean. Alternatively pour into cup cake cases and bake for around 15/20 minutes or til cooked.

Top with either an icing made of icing sugar mixed with a little orange juice til spreadable consistency, or drizzle with syrup from preserved orange peel and preserved or candied peel slices to finish. Enjoy!

 - - - -

Your weekly dose of creative inspiration can be found over here.

Cakes creatively iced by my little girl :-)


Monday, June 11, 2012

Weekend cooking - honeycomb

The weekend's a time when I sometimes get the opportunity to cook something different or fun, a change from the quick and easy routine of weeknights. Come and see what I've been up to this weekend..

Our little girl just spent the last few nights in her own bed (instead of ours) - woo hoo! She was so proud of herself yesterday morning and we were so pleased with her (let's not even think about whether it will continue at this stage) that I wanted to give her a treat, so we made honeycomb together.

I think I was in my teens last time I made it (with my mum) and I remember it bring tricky, so I was quite careful with it and used a candy thermometer to get the toffee base right. I thought the kids would enjoy seeing the mixture fluff up when the bicarb soda was added and they did but I think I got more of a kick out of it than they did!

I used this recipe and it turned out pretty well, quite an open texture inside with a nice honey-ish flavour. As it was also our "movie and dessert night" that night I thought I'd make a dessert out of it too. So I crushed up some of the honeycomb and mixed it with some softened vanilla ice cream to make hokey pokey. Then I added a hot chocolate sauce to pour over (heat some cream, add some chopped dark chocolate and stir til melted & smooth). Chocolate and honey is a combination that I really like (as well as chocolate and orange chocolate and mint, chocolate and... ;-) I then sprinkled over some crushed honeycomb to finish it off, you know, because it needed some more sugar (not!). Strange sounding dessert but it was pretty yummy. I'm dreaming about having it again already.


As a sweet by itself (rather than a dessert) I think the honeycomb pieces would be better half dipped into melted chocolate (like a Violet Crumble or Crunchie bar) but I was feeling pretty concerned about our dental health by this stage so thought I'd better not do it - that would be going just a step too far!

Hope you've had a sweet (but not too sweet!) weekend too.

Monday, May 21, 2012

Chocolate orange pudding

Chocolate self saucing pudding is one of those recipes that I have literally been making for years. The recipe is hand written in an old recipe journal of mine that dates back to my uni house sharing days, so that means it's at least 20 years old (yikes!) and I've no idea where it comes from. Perhaps an old housemate?


Anyway, I got out the ingredients last night to make it for our weekly 'movie and dessert night' and suddenly had a flash of inspiration to add something from our fruit bowl. I sometimes add a chopped up banana if there's one looking sorry for itself, but this time the orange was calling me. And it worked out well, lifting it a little above the norm, I think. So I thought you might like the recipe too. If you have your own grubby hand written ancient version I understand you'll probably want to stick with that, but if not, give this a go next time you're looking for something quick and easy to stop the kids whining. Works for me ;-)


Chocolate orange self saucing pudding
(serves about 6)

1 cup SR flour
1/2 cup sugar
1/4 cup cocoa
1/2 cup milk
30g butter, melted
3/4 cup brown sugar, firmly packed
1/4 cup cocoa, extra
1 1/4 cups orange juice/water*
1 orange, zested and juiced

Sift flour, sugar and cocoa into a large bowl. Make a well in the centre and stir in the melted butter and milk with a wooden spoon. Stir in the orange zest. Smooth top with back of the spoon.

In a small separate bowl mix together the brown sugar and sifted extra cocoa. *Squeeze the orange juice into a measuring jug and fill up with hot water to 1 1/4 cup mark. Mix this into the sugar and cocoa mixture.

Pour sauce gently onto the pudding and place into preheated oven at moderate heat (180c) for about 35 minutes or til top is firm to touch.

Serve with cream or vanilla icecream and orange zest.

Tuesday, May 1, 2012

Apple jam

My KCWC effort started enthusiastically last week but completely fizzled out around Friday, unfortunately. I'm happy though that I got a few useful clothes for the kids out of it, and the biggest bonus of participating was the vast amount of inspiration that I got from seeing everyone's creations - wow there are some amazing sewers out there!! My Pinterest 'kids clothes' folder has been topped up and I have lots of ideas swimming around in my head... but onto another of my loves, food ;-)

We're not huge jam eaters here but I do like to have a jar in the fridge to serve with scones, pikelets and to use with biscuits etc. But we are huge apple fans, so when I saw a recipe for apple jam in Lotta Jansdotter's inspirational book Homemade Living I knew it would linger in my mind until I made it!
And it's truly lovely - very apple-y, chunky, with a lovely jelly-like texture. My only complaint would be that even though I changed the recipe to use less sugar it is still a little sweet for my taste. So next time I make it I think I'll either reduce the sugar further or try to buy more tart apples (or maybe use more lemon juice? Any jam makers out there with some suggestions?).

Oh, and it's yummy with scones :-)


Apple  Jam
Makes about 3 cups 

1 kg green apples, peeled, cored and chopped
Juice and zest of 1 lemon
1 cup water
5 cups sugar

Combine the prepared apples, lemon zest and water in a large saucepan.  Simmer over medium heat for about 15 minutes or until apples are softened but not cooked all the way through so that the apples hold their shape. Stir in the sugar and lemon juice. Cook, stirring constantly until the mix boils. Reduce the heat and simmer for about 20 minutes or until the jam thickens (I did the cold plate test just to check that it was setting). Cool and place into jars. Keep in the fridge.


Wednesday, March 28, 2012

Roasted carrot dip


I often fall into the habit of serving something sweet for the kids' afternoon tea. Sure they love scones, slices, biscuits, pikelets etc but they seem to get enough sugar in their days, and I find our sugar consumption creeps up on us without me realising it.

When I bought some lovely sourdough recently I thought I'd serve it for afternoon tea along with some things to put on top. We had some humous, cheese and olives in the fridge, and I decided to make a carrot dip to go with it. I've made several times before but always served to adults along with a beetroot dip and olives. The original recipe is here at Gourmet Traveller and suggests making labne to have with it and serving it with pitta toasts. It's pretty simple to make, particularly if you have some kind of food processor to wizz it up in. The roasting of the carrots and garlic are what really gives this its wonderful flavour and elevates it to something a bit special.


Roasted carrot dip

4 large carrots, peeled and chopped into large chunks
5 cloves garlic, separated from bulb but skins intact
3 tablespoons olive oil
1 cup natural yoghurt
1 lemon, juiced and zested

Preheat oven to 200c. Place carrots and garlic in a baking dish, along with a good glug of olive oil. Cook until tender. When cooled enough to handle, squeeze garlic from skins and discard skins. Place everything from the roasting pan (including oil) plus the remaining ingredients in a food processor and process until smooth. Alternatively, mash the carrot and garlic with a fork then mix in the other ingredients. Keeps covered in the fridge for 2/3 days.


They liked it all partly because it was a change, I think (but I'm sure there'd be a mutiny if the sweets were off the list permanently ;-) 
 
PS - arghh, this formatting malarkey is driving me nuts!! 

Thursday, February 9, 2012

Weekend cooking - fresh pasta

The weekend's a time when I sometimes get the opportunity to cook something different or fun, a change from the quick and easy routine of weeknights. Come and see what I've been up to this weekend..


Last weekend I did two things that I haven't done in 7 years - I went to a yoga class (yay!) and made fresh pasta. I know it's been 7 years because I was pregnant with my first baby last time I did these things. And she turns 7 in a couple of months. I guess in some ways I feel like I'm at last sticking my head out of the fog (good fog, but fog never-the-less) of having very small children, and starting to enjoy a few old favourite things.

Apart from being too busy and sleep deprived, another reason I hadn't attempted homemade fresh pasta in that time is that I've only ever used recipes containing eggs, and as you may have heard me mention before, my big girl is allergic to them. But I recently did some research and found that using semolina flour, as opposed to ordinary flour, does the trick.


Commercially most pastas are made without egg, just using flour and water, but they use machines to knead the dough, and without the elasticity that the egg adds I was worried that a homemade version would be awful. But I shouldn't have worried because it turned out really well. The kids kept asking for more and we ended up eating the whole batch (no leftovers for the next day :-( I do love leftovers ;-)

And it was fun. The kids watched with interest rolling out with the dough with the pasta machine, and then they played with the scraps after dinner. Here's my trusty assistant getting to grips with the process.


I should point out here that this is not a quick and easy meal, rather a slow and leisurely activity, perfect for when you're at home on a rainy Sunday, or something like that. I use an Italian pasta machine to roll out the dough by hand, and this takes a bit of practice and confidence, but it is fun, and if you're interested I'd encourage you to try it - feel free to email me with any questions - I'm not an expert (last time was 7 years ago afterall!) but I may be able to help. You can roll out the pasta with a rolling pin instead, but I think it would be hard work as it is quite a stiff dough.


Egg-free fresh pasta

3 cups semolina flour (I used Grenoro brand)
1 tsp salt
2 tblsp olive oil
About 1 cup warm water

Mix all ingredients together to form a firm and moist but not sticky dough (you may need a little more or less flour). Knead for about 10 minutes until silky smooth. Using a strong mixer with dough hook attachment is a good option here if you get tired arms (or are lazy like me ;-). Cover the dough and let it rest for about half an hour.

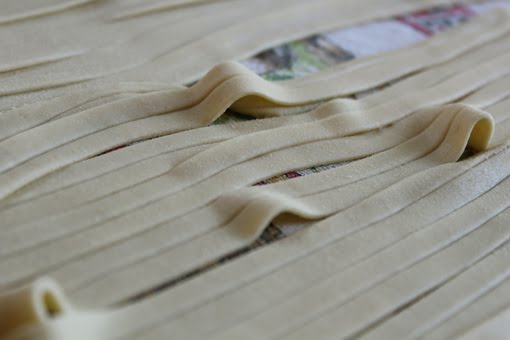
Roll out into flat sheets using a pasta machine according to the instructions, then cut into what ever shape you like. Here we've done ribbons or fettucine.


Cook in boiling salted water until al dente. This is usually just a few minutes - much less than dried pasta. Drain, reserving a little of the cooking liquid to keep it moist.

Serve with a simple sauce. My pics show fettucine with a simple tomato sauce topped with broccolini quickly fried in olive oil and garlic (courtesy of the Mr).


Tuesday, January 24, 2012

Homemade pitta bread


While visiting family over the Christmas period, my sister-in-law and niece made homemade pitta bread pockets to bring to a BBQ. They were so yummy that when we returned home I tracked down a recipe. The first recipe I tried worked really well. And it was easy. So if you're at all interested in bread making, baking, or just making homemade versions of things you normally buy, I'd urge you to try this... it really is worth the effort.


In the meal above we ate it with greek salad, roasted cauliflower, hummous, dolmades and halloumi salad, but it's also equally good split and stuffed with a few humble salad ingredients.


Homemade pitta bread adapted from Kitchen Simplicity
Makes 8

1 1/8 cup warm water
1.5 tsp. sugar
1.5 tsp. instant yeast
1 Tbsp. olive oil
2 cups plain flour
1 cup whole meal plain flour
1 tsp. salt

Stir sugar into warm water. Sprinkle yeast over top and allow to stand for 10 min. Stir in olive oil, both flours and salt. Knead until soft, pliable and barely sticky (add a bit more flour if needed). Cover with a damp tea towel and leave in a warm area to rise for 1 hour.

On a lightly floured surface roll dough into a 12 inch rope. Cut into 8 pieces. Roll each piece into a ball and place under a damp tea towel (don't skip this step - the ball shape forms the pockets). Taking one piece at a time, roll into about a 7 inch circle or oval (do not make it any larger because if the dough is too thin the pita will not puff in the centre). Place back under the damp tea towel making sure the surface is dusted with flour so it does not stick. Repeat with remaining dough. Allow to rise for 30 minutes until slightly puffed. Meanwhile preheat the oven to 250ºc/500ºF.

Put 1 or 2 pittas onto a wire cooling rack and place it directly on the oven rack. Bake for 4- 5 minutes until puffed in the centre and just starting to brown on the sides. Remove and place back under the damp towel to cool and soften. Repeat with remaining pitas.

Once cool store in an airtight container and refrigerate for a couple days or freeze for 1-2 months.


Wednesday, December 14, 2011

Mmm... apple slice


Yikes, things are busy here at the moment, as I suspect they are at your place too! But the kids still need feeding, there are preschool get togethers to cater for and lunch boxes to fill for a few more days... so I thought I'd post my favourite snacky food at the moment - apple slice.

Inspired by Fi recently (after forgetting about this Aussie classic for years), I adapted her recipe so that it was suitable for my egg allergic girl and it turned out really well. I reckon I could almost give a country bakery a run for their money ;-) Give it a try if you're after something to fill a gap. And hey, it's apple - pretty healthy really!


Apple slice

2 cups plain flour
1 teaspoon baking powder
3 tablespoons caster sugar
155g (5 oz) butter, cubed
cold water

4 granny smith apples

a little milk and sugar for the top

Put flour, baking powder, sugar and butter into bowl of food processor and process until mix resembles breadcrumbs in texture. Then add just enough cold water to bring the dough together.

Peel, core and chop the apples. Place in a saucepan with a little water and cook on medium/low heat until softish but not totally falling apart (you need some texture). Leave to cool to room temperature.

Line the base and sides of a slice tin or square cake tin with baking paper. Roll half of the dough out to a square about the size of your tin and place it in the base, pushing it out to the sides or pulling it in if you need to to make it fit. Pile the cooled apple into the tin and level with a spoon. Roll out the other pastry half in the same way and lay it over the apple, again stretching slightly if necessary. Brush the top with milk and and sprinkle liberally with sugar.

Bake at 180c for about 30 minutes or until top is lightly browned. Leave to cool in the tin then cut into squares.

Monday, November 21, 2011

Broad beans 101 and a recipe


One of our favourite family pasta recipes originally came from my Italian sisters-in-law and includes broad beans. I normally make it with frozen ones as the season is short, but when we visited my mum recently she was growing a little forest of them! So I jumped at the chance to make this favourite with some fresh tender beans for a change.


And in case you're not familiar with them I thought I'd show you a little about this lovely bean...


Broad beans growing and being harvested (enthusiastically!).


Freshly picked beans


The beans podded. The outer shells (on the left) are discarded (great for your worm farm or compost bin) and you end up with a pile of single podded beans.

If your beans are a bit old or a bit large it's good to double pod them as they may be a bit chewy - the most tender part is right inside (see pic below). The easiest way to double pod them is to heat the single podded beans briefly by boiling, steaming or microwaving them for a couple of minutes, then when cool pinching/slitting the pod open and slipping the bright green inner pod out.

Keep in mind that if you buy broad beans frozen they come single podded and need to be podded (making them double podded - phew... still with me? :-).


Left: unpodded Centre: single podded Right: double podded


Spaghetti with tomato broad bean sauce & garlic croutons
serves around 6

Tomato sauce (this is my version, you can use another basic recipe or buy a ready made sauce to speed it up)
1 small brown onion, chopped
2 cloves garlic, finely chopped
2 x 400g tins diced tomatoes
1/2 cup water
1 tsp sugar
salt & pepper to taste

Garlic croutons
Olive oil
cubed bread, about 3 cups (we like either Italian or Turkish bread but any crusty loaf will do)
Salt

Cook the tomato sauce first: Heat olive oil in a medium saucepan on medium heat. Fry onion and garlic until onion starts to go translucent. Add tinned tomatoes, water, sugar, salt and pepper, stir then simmer for at least half an hour. The flavour will keep developing the longer it's cooked - add a little water if it starts to get too dry.

Pod the broad beans and add to the tomato sauce, heating for another 10 minutes or so. They don't need much cooking.

Next cook the croutons: heat a few splashes of olive oil in a large frying pan on medium heat. Add the cubed bread and garlic and fry, stirring constantly so all the sides get a little browned and crisp. Sprinkle with a little salt if you wish. I like salt flakes.

Cook pasta according to instructions on the pack. Place a pile on each plate, add a spoonful of tomato broad bean sauce and then sprinkle some croutons on top. Finish with parmesan cheese.

• Tomato sauce can be prepared ahead of time and refrigerated. It also freezes well, so you can always double the recipe and freeze half for another time.


Can we eat it yet Mum? Stop taking photos and let us eat!

Monday, September 26, 2011

Weekend cooking - churros

The weekend's a time when I sometimes get the opportunity to cook something different or fun, a change from the quick and easy routine of weeknights. Come and see what I've been up to this weekend...


Yesterday we had one of those awful days here where it pours with rain so continuously that you can barely set foot outside the house, so I thought I'd make the kids (big and small!) a treat.

Inspired by a snack we had at a fantastic children's aerial theatre performance the day before, I hunted down an egg-free churros recipe and gave it a go. The recipe comes from here - Nigella Lawson's website, but a recipe from "Mexican Food Made Simple" by Thomasina Miers.


We all enjoyed them and I'll definitely make them again. They were easy to mix up, and use really simple ingredients. However the dough is very thick so squeezing it through the pastry/icing syringe thingy involved a lot of elbow grease! I was glad I hadn't made a double batch as my hands were sore!

We had some with cinnamon sugar as a morning tea treat and then I put the rest away for the evening (sneaking a few through the day - cook's privilege, right?). At dessert time I heated them briefly in the oven to crisp them up and made the chocolate dipping sauce from the recipe to go with them. I added a strawberry to the plates and the kids' faces lit up :-)

A nice treat for a dull day. Hope you had a sunny weekend!

Monday, September 12, 2011

Yummy egg-free date loaf


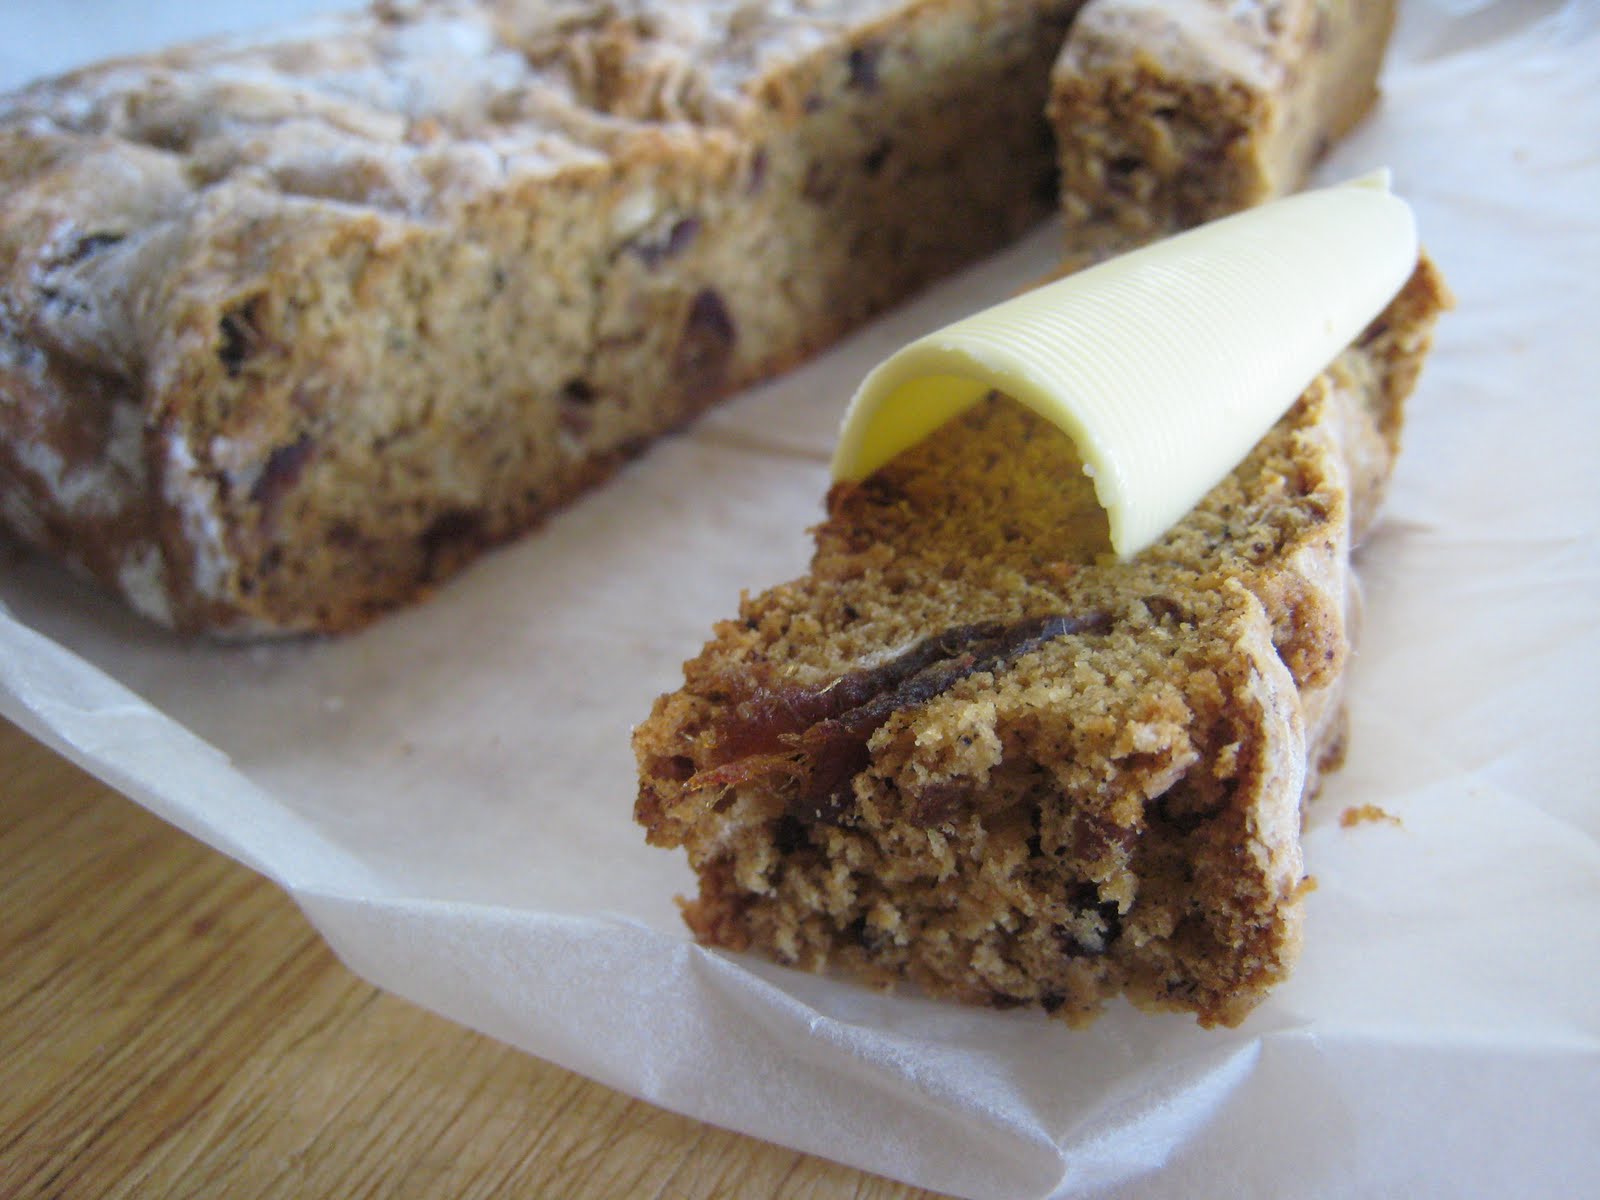
OK, I have to admit that date loaf doesn't sound so thrilling, and it also doesn't take a fantastic photo, but... this is so yummy that I made it twice last week, and all of the kids liked it, which is a plus!

The texture is bready and a bit chewy, and the dates give that lovely caramelish flavour. We ate it with curls of butter (shh!), but it's also yummy by itself. If it lasted a couple of days I think you could toast it too. Being suitable for my big girl, it's egg-free and nut-free (though I'd love to add a handful of walnuts to it if we didn't have allergies to deal with). It could also be vegan, or dairy free, if you need it to be, by using dairy-free margarine instead of butter.


So if you are at all partial to this type of thing I'd urge you to try it - it uses only 6 basic ingredients, is super easy and makes a great afternoon tea sweet treat.


Date loaf (based on this recipe)

1 1/2 cups chopped dates (leave some larger bits)
3/4 cup raw sugar (or 1/2 cup will do if you don't have such a sweet tooth)

1 tblsp butter

1 cup water

2 cups plain flour

1 tsp bicarb soda

Preheat oven to 160c.

Combine the dates, sugar, butter and water in a saucepan and simmer for about 5 minutes. Remove from the heat and let it cool to room temperature.

Sift the flour and the bicarb soda together and stir it into the mix. It will be very thick. If it seems so thick that it won't mix properly add a little more water (dates vary - some are plumper & more juicy than others).

Line a square shallow tin* with baking paper, then scrape into the tin, roughly flattening the top. Bake until brown on top and a skewer comes out clean. about 30-40 minutes*.

* Date loaf is normally cooked in a loaf tin, but as I needed it to cook quicker (so that I could get to school pick-up in time!) I used a square tin, making it flatter. I still sliced it and it made nice smallish pieces. You could use any tin you like or have though, just remember to increase the cooking time as it will be denser and therefore take longer to cook.

Related Posts with Thumbnails