Thursday, December 29, 2011
Season's greetings
Hi! Just a quick note to say I hope you and your loved ones had a lovely Christmas and best wishes for the new year.
A combination of post Christmas lethargy, computer problems and a few days away will keep me away from this space til early in the new year but I've got a few crafty posts planned, including a line-up of my most (and least) successful handmade gifts and my long promised zip purse tutorial. Til then, have fun and stay safe. Jo x
Tuesday, December 20, 2011
Screen printed produce bags
While I was screen printing fabric for my beetroot design aprons and tea towels recently I decided I might as well print some more fabric while I was all set up. So I grabbed some heavy weight cotton and cut 2 large squares.
Inspired by a huge cotton shopping bag I use for groceries on a daily basis, I then sewed this large tote, calling it a 'Produce bag'. I'm thinking that like the bag that inspired it, it would be great for grabbing some milk, fruit and bread, which seem to be daily essentials around here. Or possibly a trip to the fruit & vegie markets to load up with goodies.
The straps are strong enough to comfortably carry quite a bit of weight if need be and they're long too, giving you free hands for escorting littlies across the road ;-)
So what was a bit of off-the-cuff inspiration ended up being one of my favourite items. One went to The Sweets Workshop, along with the tea towels, trivets and aprons, and I'm planning to make more in the new year. If only I had time to make some as Christmas presents :-( Oh well, on that note I think I have to admit defeat!
- - - - - -
In unrelated goings-on, my little girl turned 4 yesterday and we had a little party for her on the weekend. There was no notable craftiness to show you, though I did make a 'princess cake' - one of those where the skirt is the cake and then you rip the legs off a barbie doll and stick it in the middle of the cake. It was fun to make and she loved it, but when a friend remarked that she didn't think I was the 'barbie type' of mum it did make me think... the balance became a bit off between letting my girl do and have what she'd like for her birthday (not just the cake) but also keeping a lid on the consumerist girliness. Hmm, something for me to keep in mind in future. This parenting gig is not simple!
Friday, December 16, 2011
Shaking it up
I've been playing around with some new-to-me crafting materials this week with presents in mind - polymer clay and hemp cord.
That along with my relatively new obsession of screen printing and the favourite - sewing, of course. It reminds me of how nice it is to mix up the crafting now and then.
Hope your holiday crafting/buying/planning is going well.
Wednesday, December 14, 2011
Mmm... apple slice
Yikes, things are busy here at the moment, as I suspect they are at your place too! But the kids still need feeding, there are preschool get togethers to cater for and lunch boxes to fill for a few more days... so I thought I'd post my favourite snacky food at the moment - apple slice.
Inspired by Fi recently (after forgetting about this Aussie classic for years), I adapted her recipe so that it was suitable for my egg allergic girl and it turned out really well. I reckon I could almost give a country bakery a run for their money ;-) Give it a try if you're after something to fill a gap. And hey, it's apple - pretty healthy really!
Apple slice
2 cups plain flour
1 teaspoon baking powder
3 tablespoons caster sugar
155g (5 oz) butter, cubed
cold water
4 granny smith apples
a little milk and sugar for the top
Put flour, baking powder, sugar and butter into bowl of food processor and process until mix resembles breadcrumbs in texture. Then add just enough cold water to bring the dough together.
Peel, core and chop the apples. Place in a saucepan with a little water and cook on medium/low heat until softish but not totally falling apart (you need some texture). Leave to cool to room temperature.
Line the base and sides of a slice tin or square cake tin with baking paper. Roll half of the dough out to a square about the size of your tin and place it in the base, pushing it out to the sides or pulling it in if you need to to make it fit. Pile the cooled apple into the tin and level with a spoon. Roll out the other pastry half in the same way and lay it over the apple, again stretching slightly if necessary. Brush the top with milk and and sprinkle liberally with sugar.
Bake at 180c for about 30 minutes or until top is lightly browned. Leave to cool in the tin then cut into squares.
Monday, December 12, 2011
Teacher gifts
This year we've been so lucky with my girls' preschool and year 1 teachers (which makes me a bit nervous for next year - surely our luck has to run out soon?), they've been dedicated and attentive, getting the best out of the girls.
I decided to make the female teachers a little zip purse each to say thank you (the male teacher gets a hand made card and a "Mr Men" book to add to his collection :-).
For this one I used a piece of a fabric I fell in love with at Spotlight recently, but have yet to decide what to make with it - probably a dress of some design. I love the Ikat design, with it's vibrant colour (hard to photograph) and cute geometric yet soft pattern. I lined it with a heavy grey cotton, used a chunky metal zip and finished it with a little ribbon for the zip pull. I wish I had time to do a matching fabric zip pull, but ah well, at least it's done and ready to be wrapped, one thing ticked off the Christmas list.
Sometimes I wish I was my cat Sausage... he gets to sleep all day. But then, he can't sew, so maybe not ;-)
• I realised recently that I still have not done a tutorial for these little purses, as I said I would, so I'm earmarking January for that.
How's your holiday making/buying/creating going?
Thursday, December 8, 2011
Playing teacher
My creative space has been filled with children even more than it usually is this week.
This term I have been going in to help out in my big girl's (year 1) art class at school once a week. I've been having a great time watching all the little people express themselves through their art. It's absolutely fascinating watching those little personalities (some I know well, others vaguely) coming through visually.
Then recently I was using one of my hand carved stamps and thought I'd love to teach the class about block printing and to make their own stamp. The very encouraging teacher welcomed my idea, so after much thought and planning I went in this week for a hectic 2 hours full of fun.
I wanted to get the mix right of freedom to be creative with some guidelines so they wouldn't get frustrated or bored. We had them come up with a simple design, then draw it on to their own rubber block. While each child sat with me individually to carve their stamp, the others in the group used my existing stamps (below) to create a card, gift card and bookmark using scraps and samples of cardboard that I'd cut and folded into shapes and brought in. I also thought they might enjoy tying some string or ribbon on to the bookmarks & gift cards, so cut a heap of lengths of various bits and pieces I had. Anything colourful or sparkly is popular, of course!
I didn't get any pics of the kids in action as I was so busy helping them (phew, those teachers earn their money!) and also wanted to respect their privacy of course. They came up with some amazing (and bizarre!) little designs, and again those personalities shone through. What a lovely thing to see.
Take a look at Our Creative Spaces (last week for the year) here.
Wednesday, December 7, 2011
Christmas decorating with flowers
When our middle child was due 4 years ago we had a flurry of activity around the house, as expectant parents often seem to :-). One of our jobs was replanting our small front garden with native Australian plants, which I have a real thing for. Luckily the Mr agreed with me on the focal point being a red flowering gum tree (though I didn't win the Kangaroo Paw argument :-).
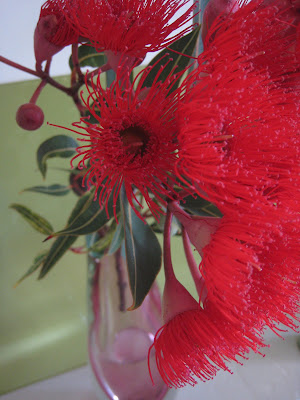
And now for the third Christmas in a row we have been rewarded with the most gorgeous bright red flowers. It feels like they are celebrating with us and cheers up our little streetscape immensely. The flowering time is short, unfortunately, so I try to make the most of it by cutting some to enjoy in the house and the kids love picking up those have dropped each day to put in little vases here and there.
Another way I like to use them is to place them in a simple wreath made of dried willow, little red glass baubles and ribbons. I love using natural elements to decorate the house and particularly love how the gum flowers add a bit of vibrancy and life to the wreath.
Do you have a favourite Christmassy flower or plant?
Saturday, December 3, 2011
An advent calendar at last
There's been a bit of angst around here about the advent calendar this year. All from me of course, with a little touch from the big girl because she was worried I'd scrap the idea altogether, poor thing. You see I started off excitedly thinking of ideas based around using the stick from last year as a holder for some little fabric treasure bags. Last year the kids loved opening a paper envelopes each day (though the then almost 3 year old didn't deal too well with sharing, poor poppet).
Then during yet another conversation about ideas for the calendar the big girl asked what would happen if someone else bought us a calendar? Now I know she was just angling for chocolate, but when the Mr said something about kids preferring store bought things to homemade I got in a huff and said that if they wanted boring mass produced stuff then they could have it!! I would go and buy them a cheap calendar from the supermarket and save myself a lot of time. So there.
Of course that was never going to happen when there was the opportunity for some craft waiting... but time was slipping away and I decided on something simple. I took some little envelopes and got the hot glue gun out (woo hoo!), got the red and white striped string that I'd bought from Kikki K recently and made numbers on the front of the envelopes. I like how they look like candy canes. It was fun doing all the different numbers (it's all about me you know!) and surprisingly quick.
I planned to fill them with a mix of treats and activity suggestions (bake Christmas cookies together, take a walk around the neighbourhood to see the lights etc.). I only filled a few so that I remembered what they were, taking a cue from Meg that the activities should surprise the children, not yourself! The activities are written on little notes then tied with red thread.
Then I used some little reindeer pegs that we'd been given last year and hung them all on a line of jute from the mantel. I added some fairy lights (which will enhance anything, right? ;-) and hoped that the kids would love it and forgive me for not buying the Cadburys milk chocolate calendar.
This morning the activity was Make berry pancakes with icecream for breakfast. Now if that's not bribery I don't know what is ;-)
Here's hoping your advent activities have been fun and bribery free!
Thursday, December 1, 2011
Chicken skirt
I 'm calling this skirt that I made for myself recently my 'chicken skirt' because... when I found the fabric in an op shop ($2 bargain - lightweight dark stretch denim), I instantly knew I wanted to try to make a skirt like this one from the fabulous Makeshift Project.
But, I chickened out and made one of my standard A line knee length skirts instead. Which turned out OK but nothing exciting. Which is what I should have expected. I realised it was a bit of a dud just as I was trying it on to adjust the hem length (at around midnight one night - hmm) and did contemplate pulling it apart but in the end decided to leave it as I was so close to finishing it, and instead vow to try something more interesting next time!
I did try to add some nice details to this though. I used a scrap of Japanese fabric that I've been hoarding for ages as a pocket bias detail, lined the pockets inside in a blue/green fabric to match the bias and then did a false hem (I think that's what it's called?) and waistband inside in a purple to also go with the bias trim. I do like adding little unexpected bits of colour here and there, even when they won't really get seen by anyone by me - but I know they're there, if you know what I mean ;-)
I also made myself a fabric cuff to wear with it (in an attempt to lift my spirits about it ;-) These are always fun to make and I get to wear a little more of a fabric I love to bits.
Pop over here for more Thursday creativity.
Subscribe to:
Posts (Atom)