Saturday, September 11, 2010

Pretty top with lala's


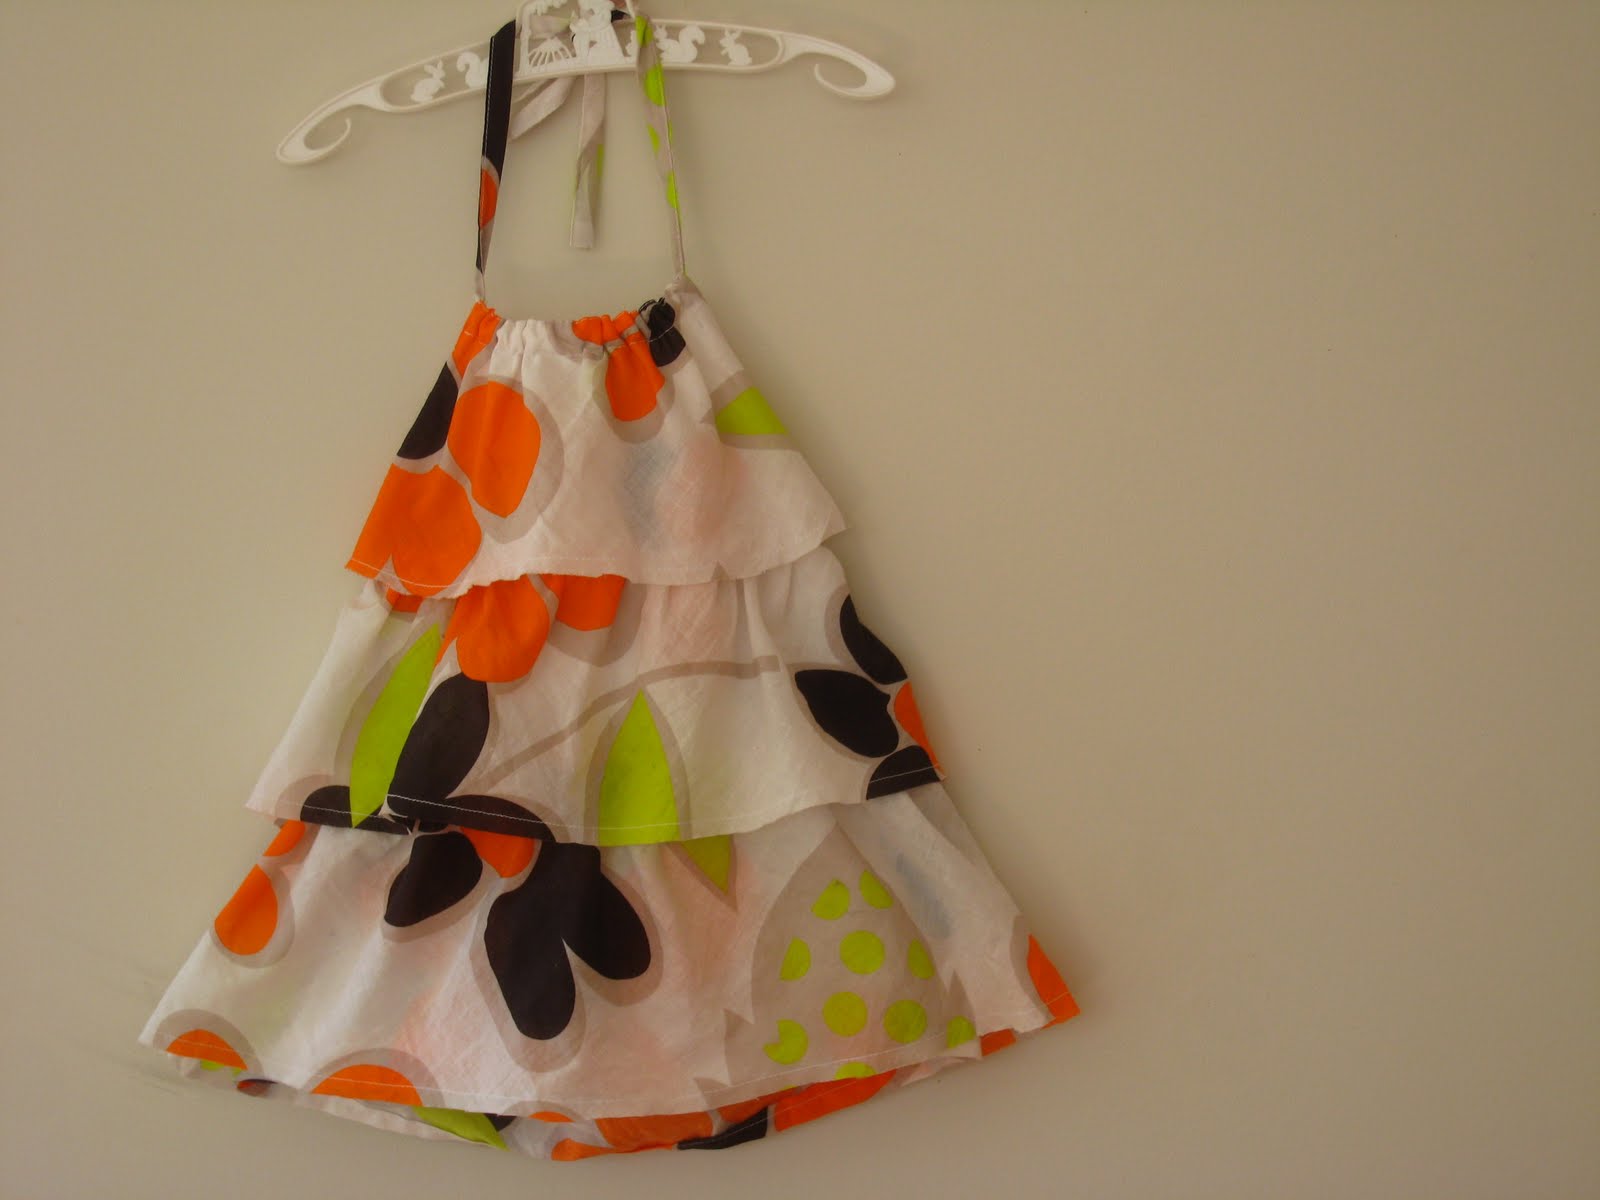
There's been a bit of rivalry here during 'holiday sewing' for mama-made items - whenever one of the girls has seen me making something that was not for them they'd ask what about theirs? And since she first saw the Ruffle Top pattern and fabric laying around, my little girl's favourite phrase has been "where's my pretty top with lala's (flowers)?" I was able to put her out of her misery this morning (after a late night!). Here it finally is...

When I saw this pattern I knew my little girl would love it - very girly and floaty, as is her want at the moment. And the contemporary floral voile works well with it. I bought the fabric years ago, just because I liked it. I find I'm never sorry when I do this because sooner or later that fabric you love finds the perfect project and turns into something you love :-)


The detail is just so cute on this top and I really enjoyed making it. It was hard to photograph it in a way that showed it properly so I'll endevour to get some good action shots of little girl on holiday to show off those gorgeous ruffles. If you like the style I'd urge you to make it. Hey, and the pattern's free (go to link above to download it)! Those Oliver+S people are so generous.


Now, the only problem is that the big girl loves it too and has said how much she'd really love one of her own "so we can wear them together when we go to dinner, Mama". Pass the matches for my eyelids please, someone. I can feel another late night coming on...

Friday, September 10, 2010

Hat in a hurry


After nearly knackering my sewing machine the other day sewing through 8 thicknesses of heavy cotton with a fine needle (hmm) for the girls' bags, an emergency visit to the sewing centre was in order this morning. The lovely repair man is now my best friend after patiently sorting it out for me. With my holiday sewing list still going I could not have my old buddy Singer 201k (1956 model) give up on me now!

So, tail between my legs and armed with 4 new packets of needles in varying thicknesses (?), we headed home. While the boy slept and the little girl painted and drew I made this hat for myself. I do already have a sun hat, made last summer from this Amy Butler pattern, but it's in a really strong print that clashes with most others, and also I felt like a change.


Peek-a-boo

After Crafty Deb made my boy a lovely little hat and t-shirt combo when he was born, I bought a copy of the pattern for the 'Lazy Day Hat' from the fabulous company Make it Perfect. There are 4 different sizes in the pattern, from a size that fits a small child up to a larger adult. I enjoyed making it, though speeding along trying to beat the clock in nap time is maybe not so wise. I love the fact that it's reversible, and as I've used a plain colour it should be pretty functional.


It's always more fun to wear someone else's hat than your own

And here's the groovy boy version from CD. Love the print.


Enjoy your weekend. I have a couple of patterns with fabric all cut and ready to sew (that's the tedious bit, right?), hopefully I'll show you over the weekend. Wish me luck :-)

Thursday, September 9, 2010

Adventuring bags


The girls are both so excited about going on holiday. I wanted to make them a messenger style bag each that they could take onto the plane, and then on our adventures, with any little things they'd like to bring. So far the suggestions have been food and toys. Sounds good to me!


I made each bag with heavy cotton, lined them and added a flap at the front and velcro closing so that it's easy for little hands. No buckles or other fancy things, but hopefully these will do the trick.


And inspiring me today are these very healthy, strong weeds that we saw on the walk home from school. If only the things I plant would grow so well! I love the simplicity of their design. I'm so desperate to get a digital SLR with a great macro lense as I love doing close-up shots. Did you know that Flowerpress has a great couple of posts on photography? They're worth checking out.


Tuesday, September 7, 2010

Monkey pants!


Finally a bit of tangible progress in the holiday sewing! But the thing I'm a little bit proud of with these pants is that I've started to overcome my reluctance to sew with knitted fabrics. As I really wanted to see if I could make a pair of these I sat down with my overlocker (serger) last night and tinkered and adjusted it for about half an hour of precious children-in-bed time until it was sewing pretty well. My overlocker and I have not been getting along that well in recent times but I must take all the blame - all that neglect and need for instant gratification has taken its toll! Crafty Deb suggested that I change needles (hmm, good point), I rethreaded it and adjusted the tension, and actually read the manual! And what a revelation - it actually works!! OK, so lesson no. 1 - taking time to do something right works (duh!).


I was going to use a pattern for the pants and found this one, which looked great, and was certainly affordable, but I looked at a pair we already had and decided surely I could take a pattern from them - and it worked! So now I'm addicted to these cute little toddler pants and want to make lots more. Maybe I'll have one 'monkey pants evening' before moving on with the holiday sewing.


I used a bit of green knitted fabric I had in the stash and the Prints Charming print from the weekend as the accent on the bum and leg trim (so I didn't waste it if I stuffed it up). Next I think I'll do the reverse, and then maybe make some from this cute birdy print I got from Spotlight a while ago. It looks a bit like pyjama fabric, but when you're one who cares if your mama makes you wear your pyjamas in the daytime, right? :-)

Monday, September 6, 2010

Three little bears


On the weekend I finished off 2 little bears - one stuffed and the other a 'heat pack' - for a customer. I also decided to also make another one for my boy, who lost his own 'diddy' recently. I embroidered his name onto the little felt heart, not that it will stop this one getting lost too!


I also went to the Prints Charming sale on Saturday, looking for a scrap bag and some of their hand printed fabric. I arrived at 11.30, only 2 hours after it had started, and almost everything was gone! They obviously have a loyal following of fans. I still found a couple of treasures though...


A length of grassy green jersey printed with one of my favourite designs of theirs will do nicely for the trousers for my boy (and possibly a t-shirt or two later on). I'm going to try some 'monkey pants' which I find so cute on littlies.


The other fabric is a discounted metre of one of their classic designs on cotton in quite girly colours. It would make a lovely trim for a dress or one of the 'Sophie tunic's.

I hope you had a great weekend.

Friday, September 3, 2010

Bread of the week - vegemite scrolls (with cheese)


I'm trying hard not to call these 'cheesymites' (Australians would know the name from the bakery 'Bakers Delight'), but that's really what they are... vegemite and cheese scrolls.

While I love our cinnamon scrolls for a sweet hit, these really are my favourite morning rolls. I'm a real savoury person in the morning and these hit the spot. They are especially good when you substitute 1 cup of plain flour for wholemeal in the basic recipe. It seems to add a bit more texture, and of course goodness.
I'd recommend baking a batch of these one weekend morning and having them for snacks through the day for hungry children (and grown-ups!). Of course they are great for school lunch boxes too.


Pull out a lump of dough from the fridge. I used about a third of the full container. Pull and stretch it (or you can use a rolling pin if you prefer) into a rough rectangle (I did about 30 x 20cm) and let it rest til it comes to room temperature or at least for a while. Set the oven to 220c with oven shelf at the top and pizza stone in if you have one.

Spread generously, or to your taste, with vegemite (or Promite, Marmite etc, any yeast spread). Sprinkle on about a cup of grated tasty cheese.

Start rolling it up from the long side, lifting as you roll so you don't squish all the filling out. When you get to the end pinch the long side shut and pinch the ends shut.

With the seam underneath, cut your roll into equal lengths (I did pieces of around 3 cm and ended up with 9). Dip your knife into flour each time you cut and use a confident, quick, light sawing motion as the dough is quite floppy.

I forgot to take a pic of this step (and the last - oops!), see this post for pics of similar.


Now lay them cut side up onto a piece of baking paper, close together but with a bit of room to spread. That way you'll get some with nice crisp outer edges and some soft squidgey ones from the centre.

Slide onto your pizza stone (or place your tray into the oven) and cook for about 10 minutes. You'll know they're ready when they are puffy and starting to brown around the edges. Don't worry if some are paler in colour than others. Leave til cool enough to handle then pull apart and enjoy!


Have a lovely weekend. I'm hoping to get lots of sewing done (hmm!), do you have any sewing or crafting plans?

PS I've added a 'search this blog' function over there on the right in case you or I want to look up an old recipe or post :-)

Wednesday, September 1, 2010

Holiday sewing list


OK, following on from my post about sewing projects for our holiday, I have a bit of a list:

For the big girl:
- 'Sophie tunic' kaftan to cover up from the sun
- messenger bag to carry her things on our adventures
- a pair of shorts "Can I have shorts please Mama? Shorts, a shirt and a bag". OK then. Does anyone have any ideas for girls shorts? She has been obsessed with skirts and dresses for so long that this has thrown me!

For the little girl:
- ruffle top
- popover dress "I want butterflies Mama, and spiders" Hmm, will have to see if I can find a fabric with butterflies and spiders - wish me luck!
- messenger bag

For the baby:
he doesn't really need anything but can't be left out, so:
- a sun hat
- shorts/trousers

Now, what do you do when you have a list of sewing to get through in a short space of time? Make something totally different, of course. Thinking we could do with a big beach type bag, I made the enormous bag pictured last night in some fabric I 'gathered' from Ikea recently. I think the print makes it a perfect holiday fabric, with it's birds and boats. Of course I could have just taken this bag, as it's a similar size, but that black background would fade quicker than you can say 'palm tree' and anyway, it's too precious ;-)


So it's a simple rectangular shape, with squared off bottom corners to give it a base, and two shoulder straps. It's not lined as the fabric is pretty heavy and I wanted to keep the bag light, but I did make a facing for the top edge (I'm sure there's a more technical way to explain that) to give the straps some strength, and I added a snap closure that I had in my stash, bought from this great online shop during my baby bag making frenzy when the baby was little. I love how these touches give a more finished look and stop it looking homemade in that not-so-good way! I find making bags so satisfying... but on to clothes now... wish me luck!

Related Posts with Thumbnails